Browsing Tag

DIY

DIY Recipes

Cat and Kitten Recipes for Tea and More

08/20/2009

Worried about kitty’s food allergies? ASPCA has the word on those. Make sure you don’t use any ingredients that will harm your krazee kitty!

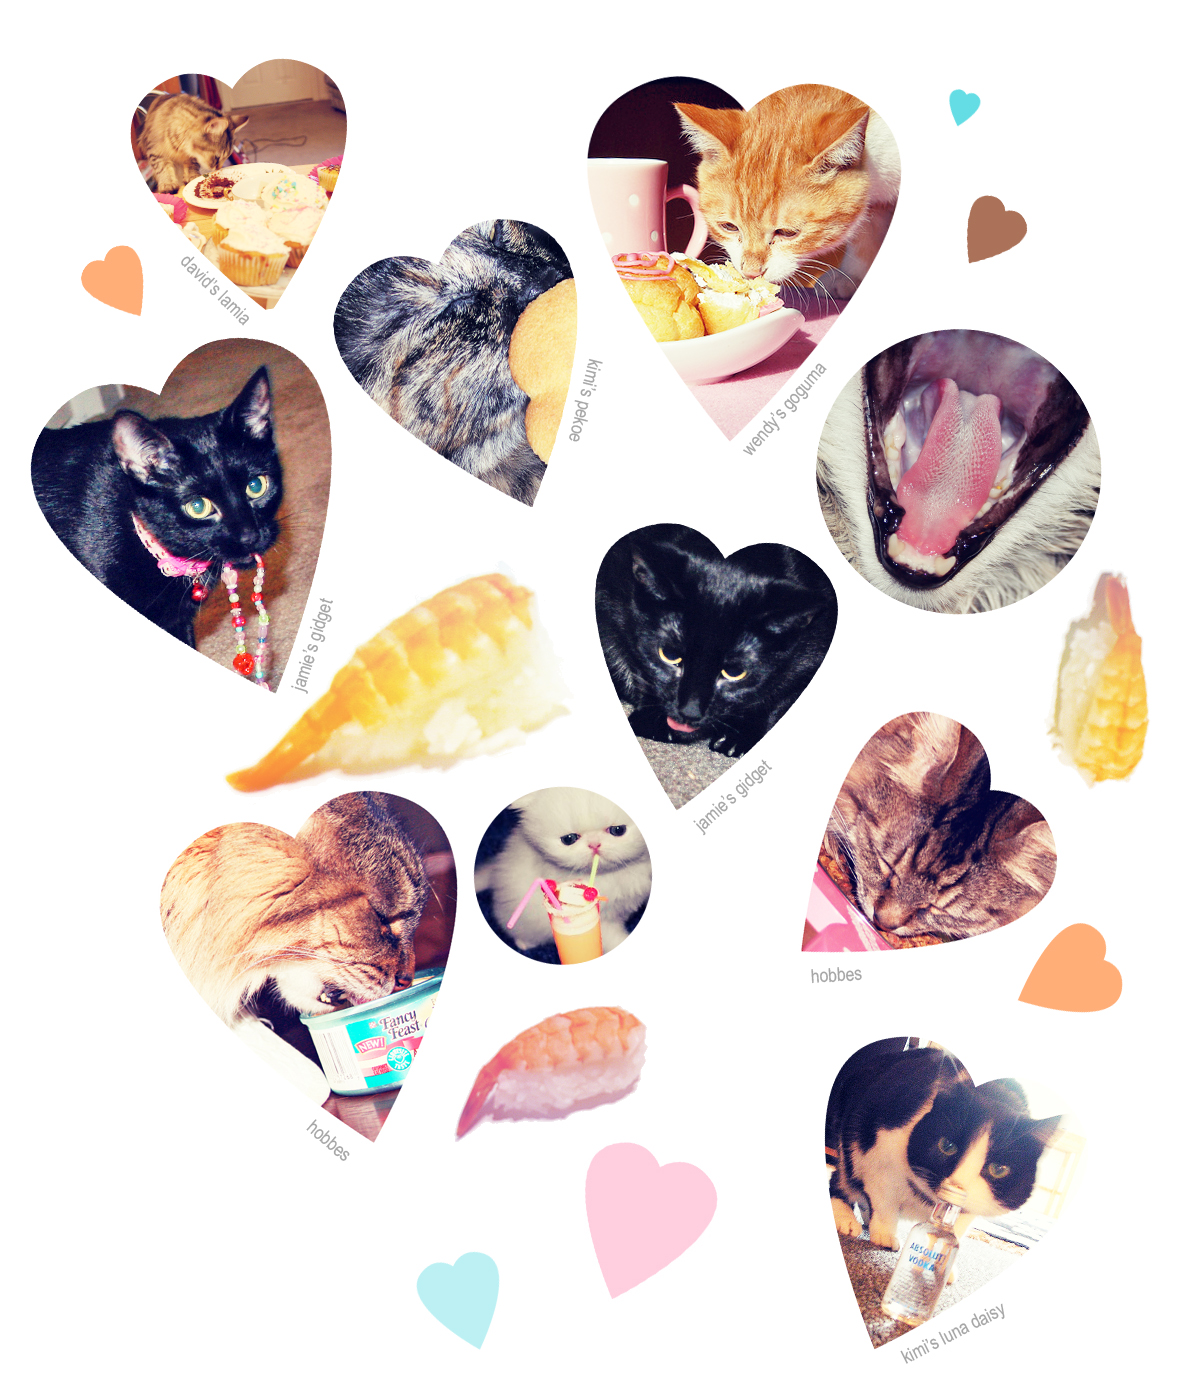
If you’re having a kitty party and having all the kitties in your neighborhood over, don’t. Kitties prefer having tea parties with their own families and are very territorial, especially when catnip and tuna are involved!

Kitty’s Cookies

1 cup of all-purpose flour
1/4 cup of whole wheat flour
2 tablespoons of wheat germ
2-4 tablespoons of catnip
1/3 cup of water
1/3 cup goat milk
2 tablespoons of vegetable oil
1 tablespoon of molasses
1 egg

Begin by pre-heating the oven to 350*F.
Combine the dry ingredients in a bowl (flour, wheat germ and catnip).
Combine the wet ingredients in a bowl (egg, milk, vegetable oil, and molasses.
Mix the wet and dry ingredients together and work it into a dough
Lightly flour the counter or other work surface
Remove a portion of dough and use a rolling pin to uniformly flatten the dough to a thickness between 1/8 of an inch and 1/4 of an inch.
Cut the dough into 1-inch squares using a rolling pizza cutter or a cookie cutter of your choice.
Place the cookies on a lightly greased cookie sheet.
Bake the cookies for 10 to 15 minutes, or until the cookies are crisp and lightly browned.
This recipe will make approximately 50 medium-sized cat treats.

Once the treats have cooled, gently remove them and place the cookies into several small freezer bags.

Tuna Surprise Kitty Bonbons

1 cup whole wheat flour
1/2 can tuna, in oil or 1/2 cup cooked chicken, chopped into small pieces
1 tablespoon vegetable or cod liver oil
1 egg, beaten
1/4 cup water

In large bowl, mash the tuna (or chicken). Add the flour, mixing well. Stir in the water, oil and egg, mixing well. Mixture will be sticky.
Shape mixture into 1/2-inch sized balls. Place on greased baking sheets. Press balls to flatten.

Bake at 350*F (175*C) for 10 minutes. Remove treats from oven; let sit 5 minutes and then turn treats over and bake another 10 minutes or until golden brown. Cool completely on wire rack. Store in an air tight container in refrigerator.

Tuna Pops

Drain liquid from tuna packed in spring water. Freeze liquid in small ice cube trays (cocktail ice cube trays work nicely, fish shaped from IKEA trays? double points!). Give no more than 2 cubes at 1 time as a treat. Reuse your can of drained tuna by placing in it an airtight container and covering with filtered water overnight for a second batch of tuna-pop water.

Catnip Tea

tea ball loaded with catnip
1 cup Water

Put the catnip in a bottle, pour in the water. Put the cap on the bottle,and shake until the catnip tea is green.

Preserving your Cooked Treats

Since these treats are preservative-free, they will not last forever. So to extend their lives, store them inside the freezer in several small freezer bags. As needed remove a bag from the freezer and leave it out for several hours to thaw. Once the treats are thawed, transfer into a Tupperware container for easy access and store the treats inside the refrigerator for up to two weeks.
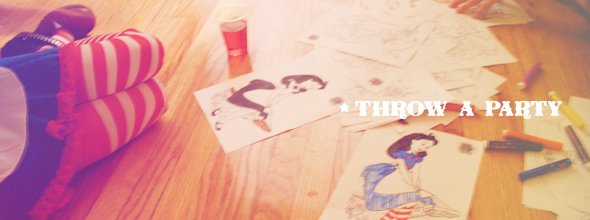
Visual Splendor

Pretty on Penn St Apartment Tour

08/11/2009

A gem hidden downtown was this adorable little city building. Upon entry the antique tile floors, mail room, paneled walls and arched ceilings made way for a lovely place to collect your mail from the original mailboxes.

Inside the hardwood gave way to seats and built-in walls waiting side by side for someone to take a rest and gave up the staircase to the chandelier above. Four of the bottom apartments were 2-story with staircases inside, it happened that ours had a spiral staircase just waiting for Hobbes to run up and down every step. The staircase curled into a small, basement living room and kitchen, above, by the entry door, was a bathroom to the left and a bedroom to the right. The bedroom was complete with vintage, original window facing towards the spiral stairs that lead below. A landing facing built-in shelves and windows with plenty of sill for plants and kitties to sunbathe on. This was my favorite apartment because it was absolutely made for us! Without ample storage it was nearly impossible to grow in the teeny, tiny adorable apartment (we are now with Chihuahua!).

jumble

IMG_8552.JPG

IMG_8554.JPG

IMG_8564.JPG

IMG_9199

IMG_2558.JPG

IMG_2351.jpg

IMG_1907.JPG

IMG_1239.JPG

IMG_1237.JPG

IMG_1350.JPG

IMG_0969.JPG

IMG_1889.jpg

IMG_1162.JPG

IMG_0956.JPG

DIY Recipes

Recipes for Chocolate Spa Night

06/24/2009

I know I’m not alone when I say that I love every kind of chocolate there is. Chocolate bars, hot chocolate, chocolate ice cream, dark chocolate, chocolate cake, chocolate chip cookies…the list of “delicious types of chocolate” is a list that never ceases.

Recently, though, I’ve become slightly obsessed with beauty products that infuse delicious chocolately-goodness! I figured that if the big stores like Philosophy and others are making their own chocolate products, why can’t I? And on that same note, why can’t you?

Here are 3 delectable DIY beauty recipes that use chocolate as their main ingredient.

Scrumptious Chocolate Facial Mask

What’s it for? Moisturizing dry skin
Indulge yourself with this sweet face mask. It serves as a moisturizing agent and leaves your skin ultra soft to the touch. Here’s what you need to gather:

3 tbs. heavy cream
2 tsp. cottage cheese
1/4 cup honey
3 tsp. oatmeal
1/3 cup cocoa powder

Combine all of the ingredients into a bowl and stir until you have a smooth and consistent texture. Get rid of any lumps and bumps!

If you have a blender it would probably be easier to mix the ingredients that way.

Once your mixture is ready to go, tie your hair up and apply it to your face. Let it set for 15 minutes. Rinse with warm water and follow with a splash of cold water to tighten your pores. Gently pat dry.

Decadent Chocolate Body Scrub

What’s it for? Exfoliating skin
This recipe yields one fierce body polishing agent! And it smells great, too! This is what you need:

1/2 cup white sugar
1/2 cup brown sugar
1/2 cup canola oil
1/4 cup powdered cocoa
A few drops of chocolate and/or raspberry fragrance oil (optional)
In a large bowl combine all of your ingredients. Mix thoroughly until the mixture is smooth and consistent in texture.

Liberally apply the contents to your body with a washcloth or loofah. Gently massage it into your skin in a circular motion while in the shower. Rinse off and feel refreshed!

*This recipe will yield plenty so there is enough for future uses! Store the remains in an airtight container. It will last for up to 6 months.

Sweet, Sweet Chocolate and Honey Scrub

What’s it for? Exfoliating and moisturizing
This is similar to the above recipe only this one incorporates a little bit of honey (which adds moisture) and uses salt instead of sugar for a less-course mixture! This is great if you are looking for a refreshing scrub-down! This is what you need:

2 cups honey
1/2 cup grape seed oil
6 tbs. unsweetened chocolate
2 cups kosher salt

First, grate your unsweetened chocolate into a medium sized bowl.

In a separate bowl, place your honey and grape seed oil until the two are blended together. Add the chocolate and salt. Mix completely until you have a texture that is smooth and consistent.

Liberally apply the contents to your body with a washcloth or loofah. Gently massage it into your skin in a circular motion while in the shower. Rinse off and feel refreshed!

*This recipe will yield 2 uses. Store the remains in an airtight container.

DIY Recipes

Super Cute Party Ideas and Recipes

06/24/2009

Throwing a party always sounds like a good idea when you’ve got a great theme and apt time to invite friends! When planning an adult party with friends the most important thing to remember is keep it fun, keep it going strong (until the party ends). Sometimes when several groups of friends are invited there is an awkward time period where guests don’t feel comfortable talking, make sure to serve drinks, snacks and start a fun group game or a conversation that all parties can participate in. Even if you feel your guests aren’t the crafty type, whip out some diy stations! Have a coloring section with vintage toons to bring back fond memories or a beading station. Sometimes guests simply enjoy doing things with their hands while chatting.

Themes are commonly overlooked by today’s party throwers, after all we don’t have the time of the 50s housewife to focus on every last detail. We can however design one rad party.

Try throwing a..

Craft Party

Set up numerous types of craft stations for making worthwhile goodies. Ask party goers to bring their own doodads and knick*knacks for your stations. (Hint: vintage charm earrings, mosaic frames/mirrors, water coloring desserts)

Holiday Party

For those tapped out on ideas, you could just wait for any ole holiday to roll by and throw a party in honor of it. You can do a Valentine party with pink champagne, karaoke and heart decor; or bunny-shaped mooncakes for the Chinese New Year.

Taffy-Pulling Party

A fun retro party for adults or children. Just throw in some candy-flavored cocktails and have the taffy ready for pulling after everyone arrives and gets introduced.

Saltwater Taffy Recipe
3/4 cup water
2 cups sugar
1 1/4 cups corn syrup
2 tablespoons butter
Flavoring and coloring as desired
1 teaspoon salt

Measure 2 cups sugar, l 1/4 cups corn syrup, 3/4 cup water, 1 teaspoon salt into a saucepan and blend well with a wooden spoon. Place over low heat until sugar has dissolved, stirring continuously. Increase the heat and do not stir during the rest of the cooking. Wash the sides of the pan with a brush or fork covered with muslin and dipped in water, using an upward motion. This will prevent the formation of crystals which might cause the candy to sugar. After the syrup boils put in the candy thermometer, and when the thermometer registers 265 degrees, remove candy from heat. Add 2 tablespoons butter and stir very gently. Divide the taffy into three parts; you’ll add different flavors and coloring to each one during the pulling process.

Drive-in Party

Bring snacks, grill-out, set out picnic blankets and lawn chairs and prepare your projector for a private, friends-only outdoor screening. Try a creepy, crawly horror film while camping!

Disco Party

Dressing the part is a must, dig out your soul train collection and project it onto the wall or play it in your tv set, think dark, lights, glitter and mirrors to create a disco fantasyland. Skates can be optional if you don’t have carpet hiding your floors. The only thing better than disco is roller disco.

Costume Party

Theme it over a certain costume, such as a Marie Antoinette Cocktail Party, or allow all costumes.

Tea Party

Have many assorted pots of tea and teacups of all shapes and sizes everywhere, guests should have the option of trying whichever tea they like! Be sure to have sugar cubes and cream available for the sweetie lovers. Scones, cupcakes, tartes and tortes are musts. Do not skimp, break out the strawberries and chocolate. Litter the table with champagne glasses and raspberries and break out the champagne and dessert wine if the tea party continues into the evening.

trois tea

Psychedelic Party

Trippy records, shag rugs, motion lamps and colorful lights. View some vintage cartoons about dreamland and take a walk outside through the neighborhood. Live near any parks or beaches? They might be fun to explore with friends.

Bring-Along-Pets Party

This could be fun or horrible! It all depends on your small ones. Make sure there is ample food and water around, keep it specific to one type of animal such as cats, small dogs or large dogs (would be best in the backyard or at a local dog park).

Funny Hats Party

For those that aren’t ready or willing to commit to a full-costume party. You can also have a 40s Hat Party, a Tacky Brooch party, etc.

Masquerade

Require masks upon entry or make masks upon entry. Use classical music and offer whimsical, fantastic foods such as magical candied apples and Absolut Raspberri Royals.

Absolut Raspberri Royal
1 Part ABSOLUT Raspberri
3 Parts Champagne
Raspberry

Add all ingredients into a chilled cocktail glass. Garnish with 3 whole raspberries.

Similar Hobby Bring-Along Party

Collect anything that would constitute a fun party? Think Blythe dolls, sweets and cameras!

Mod Party

Keep everything mod and chill. The recipes, music, party wear, everything.

Any theme you select simply do a bit of searching on.. say I’m going to throw a 80s party then I’m going to find a good selection of 80s toons, 80s movies, similar themed-foods, activities, decor, music, etc. Do a bit of research on the topic you chose (a Fairy Tea Party!) and find ideas for food and decor.

The possibilities are absolutely endless.

DIY

Copy and Paste CSS Candy Boxes

06/01/2009

Want to know how to make candy CSS borders to use with your tastee backgrounds? Feel free to use these for your website, simply credit Miseducated https://www.miseducated.com so that others can enjoy the candy. :9 Have more fun with palettes at colourlovers.com.

Sunshine Candy

Cheshire Cat

Daisy Gnome

Wizard Wand

Moonlight Moonbounce
DIY

The Chihuahua and Her Wardrobe

05/10/2009

Hello, my name’s WANWAN and I’m a little deer chihuahua.
I find that only the cutest outfits make their way into my wardrobe and I absolutely adore prancing around and playing in them. My hair is quite short you see, I’m mostly bald! I get awfully shivery without anything on! Because of my bald little body, I also just love standing on the heat vent. Whenever it turns on I hear it and trot on over pretending I’m Marilyn Monroe.

DIY

It’s getting a little chilly here in western-US so I’ve decided it’s time to whip out all of my fibers and create a little wardrobe for my Chihuahua. I’ve composed a pattern to create an easy coat for small dogs and also for cats (although my cat is a thick puffball). The front and mid section are attached by way of your choosing (buttons, snaps, velcro). You can also knit your little one a sweater. My own pattern is simply a small tube with arm holes due to my pup’s tiny size. The coats are so easy to customize! Change up your fabrics and liners, try embroidery, patches, buttons, yo-yos, bows and all sorts of cute. Thing of fun patterns, check a vintage book for inspiration! Fun coat themes include fall, daisy meadows, mushroom forests, snow, winter wonderlands, russia (nesting dolls?), snow bunnies, etc.

Wanwan’s Picks

running!Modern Tails, The Pet Boutique, Trixie & Peanut, Calling All Dogs, Paw Palace, Pooch Online, Artful Pups, Chic Dog, Bella Claires, Paws on 5th,Doggie Clotheslines, The Ritzy Rover, Pool Pup, Bella Claires, Paws on 5th, Doggie Clothesline, The Ritzy Rover, Pool Pup, Funny Fur*, G.W. Little, Haute Dog Boutique, The Haute Hound, Ezra Dog

Doggy Tip

Dogs are a little bit stinky so it’s important to bathe then only in a special shampoo formulated for your dog’s skin. Myself, being the cat person I am found the dog’s natural scent very unappealing in the beginning. After a nice warm bath in her favorite shampoo, she smells like a coconut and as her own scent comes through I find it a sweet match. 😮 She uses an organic oatmeal shampoo for dogs and cats made with aloe, vitamin e and skin-softening nutrients I picked up at the local pet store. They have aisles of pet shampoos at all major pet stores — take a look!

Crafts DIY

Create and Flavor Your Own Lipgloss

05/06/2009

Miseducated girls like to stand out in a crowd. Which is precisely why this make-it-yourself, fully customizable lip gloss recipe is perfect. (Not to mention, Miseducated-mavens always have pretty puckers).

Read through this super easy recipe and then feel free to add whatever your heart desires (within reason, of course!) to make your very own lip gloss.

creating lipgloss

You Need

Option 1 (the extra-easy route)
Have you ever applied Vaseline to your lips? Well whether you have or haven’t, it’s a great moisturizer for your puckers. If you prefer to take the easy route (which is great when you’re in a bind), can use this as your base and then customize the rest.

Option 2
Take 1 tablespoon of beeswax and place it in a clean glass jar. Place the jar in very hot water. Be careful not to get water in it as the two don’t mix well. With a toothpick or stick-like device, stir until you see that the wax has softened.

Next, add a tablespoon of almond oil. Mix thoroughly. If you want, you can add a capsule of Vitamin E which preserves your gloss for a longer amount of time and also adds nutrients. Another option is to add ½ a teaspoon of honey. This makes it a little sweeter and also adds nutrients.

If you’re a simple lassie then you can stop here. If you’re in the mood to customize, here are a few ideas to give a go:

Customize your Gloss

Fresh and Fruity
Add a few berries to your mixture while it’s hot. Crush the berries and pick out the skin or strain it. Some great berries to try are cranberries (which create a lovely shade of dark pink) or blueberries which create a pinky-tone. [Check out my Berry Beauty article which has a great Blueberry Honey gloss].

Mighty Mint
Add a few drops of peppermint or spearmint oil, mix it up and you’re set to go! Refreshing!

Cola Queen
Add a few drops of your favorite cola (try Sprite or Orange!) and mix thoroughly. Yum!

Charming Chocolate
You can either purchase chocolate scented oil or melt a little piece of chocolate with your beeswax. Guaranteed to melt on your lips! That’s a good thing.

Whimsical Flowers
Feeling romantic and whimsy? Try a little jasmine, rose or lavender oil!

Brewed Beer Gloss
That’s right! Infuse your lips with the scent of beer! Just add a few drops of your favorite brew and mix it up.

Lemon Lady
If citrus is your thing, squeeze a bit o’ lemon, lime or orange juice into your beeswax and mix thoroughly. Zing!

These are just a few ideas. Let your mind go free and you’re sure to come up with even better customizations!

*Make this gloss in small doses as it does not last forever. Store it in your fridge at night to make it last longer. Oh, and if you want to bring it out with you (a total “do”), store it in a recycled lip gloss container or even a fabulous little pill box!

DIY Recipes

Egg Beauty Recipes for Eggstacy

05/06/2009

We all know that eggs are a great food source and mega healthy for your body. But did you know that the all-natural item is also beneficial for your skin? In fact, egg whites clear up/prevent acne and blemishes, tightens skin and decreases signs of age.

Here are a few egg*y DIY beauty recipes for you to try at home! I promise, these recipes will yield products just as good (if not better) than any spa could provide you!

diy egg beauty

Chilled eggs and honey face mask

This cool face mask is great for dry skin. It’s soothing and moisturizing! Here’s what you need:
1 egg
1/2 cup coconut oil
1 tbs honey

(1) Heat your coconut so that it is warm, but not too hot. You can do this in a microwave save container in your microwave or over the stove at a low-medium heat.
(2) The first thing you need to do is crack your egg open into a small bowl. Beat the egg until it is foamy and consistent in texture.
(3) After you’ve finished stirring the egg, gradually add your warm coconut oil. Doesn’t it smell delicious? Next, add your tablespoon of honey. Beat all of these ingredients until you have a semi-thick consistency (similar to mayonnaise).
(4) This next part will sound a little strange! Use an empty toilet paper roll and place one end into a bowl. Put your mixture inside of the roll and place it in the freezer. Remove the roll once the contents inside are completely frozen!
(5) Once it’s frozen, peel part of the toilet paper roll away (about 1/4 inch) and apply to your face, rubbing it around in a circular motion. It should resemble a frozen popsicle! Let the contents sit on your face for about 10 minutes and then rinse with warm water. Splash your face with cold water to tighten pores and gently pat dry.

*You will have plenty left over for future-use! Simply cover with a plastic bag and place in the freezer again.

Moisturizing Egg Yolk Hair Mask

This recipe is super easy and a great cure-all for dry hair, dead/split ends and frizz issues! Gather these items before you begin:
1 egg yolk
1 cup milk
1/2 tbs. rosewater (optional)

(1) Separate the egg yolk from the egg white and place in a small-medium sized bowl. Beat the yolk until there are lots of little bubbles on the top – it should be frothy looking!
(2) Gradually add the milk in. If you have rosewater, you may add the 1/2 tbs. at this time. Mix all of the ingredients together until you reach a consistent texture.
(3) Apply the mixture onto your hair, starting with the ends (which tend to be the driest). Work your way up until your hair is fully coated.
(4) After 15 minutes, rinse the egg mixture from your hair with tepid water (if it’s too hot you’ll end up with scrambled egg-yolk hair). Make sure you remove everything!

Shine Reducing Egg and Lemon Treatment

This treatment does wonders for a tired and/or oily face. Not only does it firm and tighten skin but it also reduces shine. Here’s what you need:
1 egg white
1 medium sized lemon

(1) Separate the egg white from the egg yolk and place in a small-medium sized bowl.
(2) Cut the lemon in half and squeeze out the juice into your bowl. Remove any seeds that may have danced their way into the bowl!
(3) Whisk the lemon juice and egg until it is completely blended. The texture should be smooth and consistent.
(4) Apply the concoction onto your face and let it set for 15 minutes. Once it’s hard and flaky, rinse the mixture from your face with warm water. Splash your face with cold water to tighten pores and gently pat dry.

You may follow up with your nightly moisturizer.

Good luck and happy beauty!

Design Your Life

What Life Should a 20-Something Live?

04/23/2009
what life to live?

I am a twenty-four year old woman and I don’t know what I want to be, do or where I want to live when I grow up. Sound familiar? Lately I’ve spoken to a lot of girl friends and women and have found they all have questions and concerns about the life they have chosen and the lifestyles they are living. Women have more choices than their mothers and grandmothers, they have a choice to be whoever they want to be, to live however they want to live. This also makes for more stress, what if you miss your chance? What if you wake up when you’re 60 and realize you didn’t achieve any of your main goals and choices? Possibilities are endless. Lately ladies have been finding economic stresses and lifestyle decisions that leave them in shells, filled with questions. How can you decide how to live your life when you can’t even afford to live it? Will you marry? Start family? Start a business? Travel the world and write a novel? Record a demo and play your songs live? Redesign a product? Help people in some way? Whatever you life you create, build it — be conscious you’re always changing and you’re always molding your life into the life of your dreams. If you’re not happy where you are after honestly questioning yourself, find new routes, question yourself about new goals and dreams, make steps to create the life you want and that life will be yours.

DIY Lifestyle

Step 1: What is my lacking in? What is abundant in my life?
Step 2: What is my dream life and what goals do I want to achieve in life?
Step 3: How can I achieve these goals? (even if you’re not sure, quite a lot of resources are available for us to research possibilities)
Step 4: Make conscious efforts, daily, to create that life and achieve those goals. Talk to people doing what you want to do, tell them you admire them and get advice.
Step 5: Continue working towards and gaining the benefits of your dream lifestyle.

Lifestyle Inspiration

Is it most important to you to do what you want to do, live where you want to live or to live with whom you want to live with?

Lifestyle Q&A

Reply or contact us for questions and comments regarding this article~ Please communicate with us if you do not want your questions/comments to show here after discussed and answered.

* The photo above was taken by myself in Hello Kitty’s house (Puroland, Japan).

Design Your Life

Who’s That Girl? Anna of Branch and Birdie

04/22/2009

At 18 I ran as quickly as I could from my two stoplight town, to New York City where I dabbled in the fashion and modeling industry.

At 19 I tried out Los Angeles and motherhood all at once. Three years later my daughter and I headed back to the Big Apple in search of something more. What I did find was my soul mate, and we moved out West together to bask in a few of San Diego’s rays. Sunny yes! Creativity and culture? Not so much!

So a Medical Assistant Certification, a marriage and one more baby later my little family of four and I trudged to the rainy town of Portland, OR. Now at 25 years old here I am.

My life has already started, it’s in process and I knew I would not ever be content without creating and decorating.

I had always dreamed of having a little boutique full of local artist’s goods, but I never would have imagined that I would be able to become that local artist. I had sold some of my handmade jewelry in stores before, but did I have the motivation to start up my own empire? Then I discovered Etsy! Fantastic! Phenomenal! A mecca of beauty and vision! With a few click clicks on my computer keyboard, and some design help from my genius filmmaker husband (owner of Two Penguins Productions) I plunged forward and started up Branch and Birdie.

I find my inspiration in nature, scavenging through thrift stores and watching my daughters draw and play! As women we are being profiled from birth, directed to become the celestial being of beauty- but don’t you think that it’s time we take charge? Diaper in one hand, courage and confidence in the other? So good bye NYC glamour and hello PDX basement! I’ve traded my Louboutins in for a sewing machine, and couldn’t be happier.