Browsing Tag

recipe

DIY Recipes

Egg Beauty Recipes for Eggstacy

05/06/2009

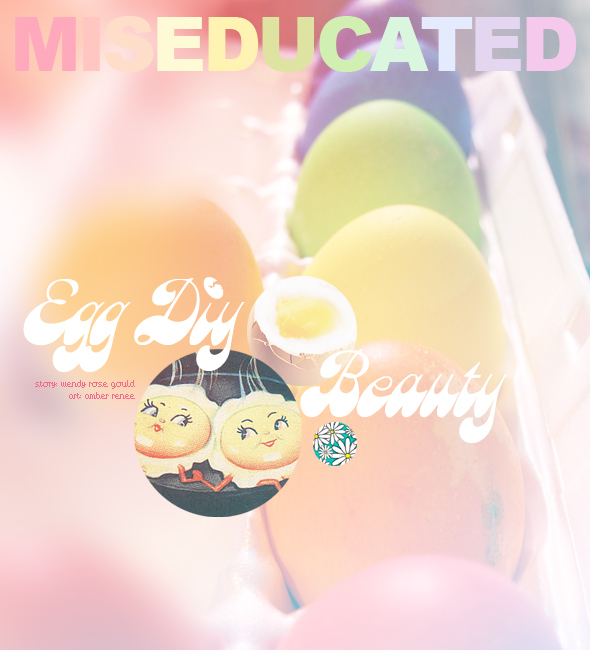
We all know that eggs are a great food source and mega healthy for your body. But did you know that the all-natural item is also beneficial for your skin? In fact, egg whites clear up/prevent acne and blemishes, tightens skin and decreases signs of age.

Here are a few egg*y DIY beauty recipes for you to try at home! I promise, these recipes will yield products just as good (if not better) than any spa could provide you!

diy egg beauty

Chilled eggs and honey face mask

This cool face mask is great for dry skin. It’s soothing and moisturizing! Here’s what you need:
1 egg
1/2 cup coconut oil
1 tbs honey

(1) Heat your coconut so that it is warm, but not too hot. You can do this in a microwave save container in your microwave or over the stove at a low-medium heat.
(2) The first thing you need to do is crack your egg open into a small bowl. Beat the egg until it is foamy and consistent in texture.
(3) After you’ve finished stirring the egg, gradually add your warm coconut oil. Doesn’t it smell delicious? Next, add your tablespoon of honey. Beat all of these ingredients until you have a semi-thick consistency (similar to mayonnaise).
(4) This next part will sound a little strange! Use an empty toilet paper roll and place one end into a bowl. Put your mixture inside of the roll and place it in the freezer. Remove the roll once the contents inside are completely frozen!
(5) Once it’s frozen, peel part of the toilet paper roll away (about 1/4 inch) and apply to your face, rubbing it around in a circular motion. It should resemble a frozen popsicle! Let the contents sit on your face for about 10 minutes and then rinse with warm water. Splash your face with cold water to tighten pores and gently pat dry.

*You will have plenty left over for future-use! Simply cover with a plastic bag and place in the freezer again.

Moisturizing Egg Yolk Hair Mask

This recipe is super easy and a great cure-all for dry hair, dead/split ends and frizz issues! Gather these items before you begin:
1 egg yolk
1 cup milk
1/2 tbs. rosewater (optional)

(1) Separate the egg yolk from the egg white and place in a small-medium sized bowl. Beat the yolk until there are lots of little bubbles on the top – it should be frothy looking!
(2) Gradually add the milk in. If you have rosewater, you may add the 1/2 tbs. at this time. Mix all of the ingredients together until you reach a consistent texture.
(3) Apply the mixture onto your hair, starting with the ends (which tend to be the driest). Work your way up until your hair is fully coated.
(4) After 15 minutes, rinse the egg mixture from your hair with tepid water (if it’s too hot you’ll end up with scrambled egg-yolk hair). Make sure you remove everything!

Shine Reducing Egg and Lemon Treatment

This treatment does wonders for a tired and/or oily face. Not only does it firm and tighten skin but it also reduces shine. Here’s what you need:
1 egg white
1 medium sized lemon

(1) Separate the egg white from the egg yolk and place in a small-medium sized bowl.
(2) Cut the lemon in half and squeeze out the juice into your bowl. Remove any seeds that may have danced their way into the bowl!
(3) Whisk the lemon juice and egg until it is completely blended. The texture should be smooth and consistent.
(4) Apply the concoction onto your face and let it set for 15 minutes. Once it’s hard and flaky, rinse the mixture from your face with warm water. Splash your face with cold water to tighten pores and gently pat dry.

You may follow up with your nightly moisturizer.

Good luck and happy beauty!

Crafts DIY

Inexpensive Do-It-Yourself Gifts

03/09/2009

This whole economic downturn has left a lot of the country in a sorry mess, but I’m not here to wallow in financial troubles. No way! I view the scarcity of cash as a wonderful excuse to get crafty! And it’s always more fun to craft for someone else which is what inspired me to create this article.

These gifts are easy to make and inexpensive, to boot! You can make them for a loved one “just because” or give it away for a special holiday. The choice is yours.

diy gifts

Hearty Bread and Jam

For you domestic creatures out there, put your skills to use! Everyone loves an edible gift, especially if it’s made by you! Jam/Jelly is a very easy item to make, it just takes a little bit longer than some foods. Bread and jam come in a variety of forms, so choose the best one for your recipient.

Cozy Blanket

Blankets are also very customizable, making them an ideal gift for any time of the year. Try these different types of blankets:

Crocheted – Choose your recipients favorite colors and have at it! They’ll be thrilled with the amount of time and effort you put into their present.

Tied – Buy two different types of fabric that complement each other. Make sure that you get a big enough size that it serves as a blanket. Both fabrics should be the same size. Next, spread the two fabrics on the floor (one on top of another) and cut around the edge. Each cut should be 2-4 inches deep. Next, tie the two fabrics together (double knot). Do this all around the edge of the blankets. Viola!

Customize – (an already made blanket) One of my favorite gifts from a friend was a blanket that she bought inexpensively and did stitch work on. It was thoughtful and unique!

Quilt – You don’t need to necessarily buy quilt material, but you can if you want. Choose several types of fabric that you like and cut them into squares all the same size. Next, sew them all together. Buy another piece of fabric and sew it onto the quilted part of the blanket.

Lovely Soap

I come from a very large family and some of my fondest memories are from the holidays when we would all work together to make presents for extended family members. One of my favorite things to make and give away was soap and other DIY beauty gifts.

The great thing about soap is that it’s practical and customizable. This is an easy soap recipe. (You can make your own from scratch with this recipe from www.thefarm.org) Here’s what you need — You can find all these items at your local craft store.

– Soap Block (available at your local craftstore)
– Soap Molds
– Scented oils (your choice)
– Other items for your soap (eg. Lavender, oatmeal, almonds, cinnamon, chocolate, etc.)

There are step by step instructions on the soap blocks and it’s very difficult to mess up. Melt your soap blocks, add scents and ingredients of your choice and let it sit in greased soap molds until hardened. Remove and place in pretty packages or gift baskets!

* Also get some wonderful ideas for soap from this Miseducated article.

Scrumptious Chocolate Covered Strawberries

First, buy about 5-15 healthy-looking strawberries. When you get home, make sure there aren’t any bad spots (if there are simply cut them away). Choose the prettiest ones and keep the green leaves on top – they look more beautiful that way.

While you’re at the grocery store, pick up some dip-able white chocolate. You can usually find this in the crafts section or near the produce. Also pick up some red food dye.

Melt your chocolate in the microwave in bursts of 15-20 seconds. It doesn’t take long to melt the chocolate so be sure to keep an eye on it.

Set aside some of the white chocolate and then add 2-3 drops of the red food dye to the remaining white chocolate. Dip your washed strawberries into the pink chocolate and place on wax paper. Next, dip the bottom part of a spoon/fork into the white chocolate and drizzle on top of your pink strawberry to add a decorative effect. Place in the refrigerator until they are cooled.

You can mix up the chocolate colors (ie. White dipped, pink drizzle; dark dipped, white drizzle) and place the strawberries in a sweet box. Add a ribbon and a card!

DIY Recipes

Sensational Seaweed and Beauty Recipes

03/05/2009

Seaweed is one of the healthiest things out there and it can do wonders for your hair, skin, nails and body. You can often find seaweed in the exotic food section of your grocery store or seaweed products (ie. Kelp, dulse, nori, sea lettuce) at a health food store/online. The following are great DIY beauty recipes that you can prepare and use in the comfort of your own home.

seaweed

Seaweed Detox Wrap

This recipe cleanses your body of all unnecessary that build up by simply walking around. It also relieves stress, slims and is a lovely treat after a long day at work. Here’s what you need:

8 ounces powdered seaweed (kelp is easiest to find)
1 cup hot warm water
2 plastic sheets (saran wrap works well).

Before you begin, prepare your bathroom for the wrap treatment. I like to lay a blanket down in the bathtub, light a few candles and let hot water run for a while to get that steamy effect (if you run water in the bathtub, lay the blankets down afterward obviously). I’ve also heard of people putting space heaters in the bathroom to keep it warm.

Next, set your plastic sheets out (or sarah wrap) so that it’s ready to go. To prepare the seaweed past, simply pore the powdered seaweed of choice into a medium sized bowl. Next, add a little bit of a water at a time and stir. Do this until you have reached a consistency that is not too thick but still applicable and will stick to your skin.

Apply the mixture to different areas of your body, such as your stomach, arms, legs, feet. Wrap with the plastic sheet or saran wrap and sit in the bathtub under a second blanket. Listen to soothing music or sip on tea for 20 minutes. Next, remove the plastic wrap and soak in the bathtub for 10 minutes or so and rinse all the residue away. Apply lotion as desired and relax for a little while longer.

Lavender and Seaweed Bath Tea

I love this recipe because you can make it in bulk and it serves as the perfect gift. Here’s what you need:

Tea bags (or tea filters)
1/2 cup dried seaweed (kelp, seaweed flakes, nori)
1 cup dried lavender

Once you’ve gathered the ingredients, mix the seaweed and lavender until you have an even mixture. Next, divide the mixture up into the tea bags and tie (you may need to purchase string depending on the types of tea bags you purchase). Draw yourself a warm bath, light some candles and drop 2 tea bags into the water. After letting it steep for 5 minutes, hop in and enjoy!

Note: If you can’t find teabags in the tea section or your local craft store, try using pantyhose.

DIY Recipes

Citrus Spa Recipes for Your Skin

01/20/2009

Citrus has wonderful affects when applied topically. That’s why fruits like lemons, grapefruits, limes, oranges, etc. are often seen in DIY beauty recipes. Citrus has naturally detoxifying effects when applied to the skin and it also serves as an astringent/toner and antiseptic. The following are three original and delicious DIY Beauty recipes that incorporate citrus*y fruits into the ingredients!

citrus

Grapefruit Toning Facial Mask

This recipe is especially great for those with oily/combination skin. The citrus juices from the grapefruit exfoliates and eliminates extra oil that may accrue over the days time. Oh, and it smells great, too! Here’s what you need to gather:

1 tsp. Grapefruit juice
2 teaspoons honey
6 ounces plain yogurt
8-10 almonds
1 tablespoon rice

Once you’ve got everything together, combine the ingredients in a blender. Blend on high for 1-2 minutes. If you notice that there are large chunks of almonds left then blend again. It may help to crush the almonds pre-blending!

Wash your face with your normal cleanser and pat dry. Apply a generous amount of the mixture to your face and spread it evenly. Let it sit for 15-20 minutes or until it has hardened. Rinse with warm water. Make sure you remove everything – you don’t want yogurt residue on your face! Splash your face with cold water to tighten pores and then gently pat dry.

Cream Cheese / Orange Facial Spread

I love this recipe because if you have any left over it makes a perfect spread for a toasted bagel! It’s a refreshing, creamy blend of goodness that does wonders to your face. Here’s what you need:

1 small-medium sized orange
½ teaspoon lemon juice
1 tsp. honey
2 ounces cream cheese (soft)

In a small to medium sized bowl, combine your cream cheese and honey. Blend thoroughly so that the honey is evening dispersed throughout the cream cheese.

Next, cut your lemon in have and squeeze out ½ teaspoon of juice. Be careful of the seeds! Peel your orange so that you are left with a skinless fruit! Take 2 slices of the orange (you can peel them apart easily) and take off the thin layer of “skin.” Add the lemon juice and peeled orange slices to your cream cheese and mix/mash until you have a smooth and consistent texture.

Your spread is now ready to spread! Apply a thin layer of the concoction to your face and let it set for 15 minutes until it is hardened. Rinse with warm water. Follow up with a few cold splashes (to tighten pores) and gently pat dry!

Pineapple Papaya Acne Treatment

Again, this one is good enough to devour! Papaya is a powerhouse of nutrients and enzymes that work to heal the skin. It does wonders for acne-prone skin. The citrus*y pineapple is a gentle exfoliator and the honey/yogurt work together to moisturize. Round up these ingredients before you begin:

1 cup fresh pineapple (avoid cans)
¼ cup fresh papaya
2 grapes
½ tablespoon honey
1 tablespoon yogurt

After you’ve prepared your pineapple and papaya, take 2 grapes and peel the skin off. In a small to medium sized bowl, mix all of your fruits together, mashing them well so that you have an evenly combined mixture of delicious looking fruit. Try to not to eat any!

Next add to your bowl the honey and yogurt. Mix well and let it set for 10 minutes in the refrigerator. This gives the papaya and pineapple juices time to seep into the mixture.

While you’re waiting, cleanse your face with your normal face wash and pat dry. Next, apply the mixture to your face focusing on those areas where acne is most troublesome (T-zone, chin, etc). Let the mixture set on your face for 20 minutes. Rinse with warm water and gently pat dry. This also works well on other acne-prone parts of your body.

DIY Recipes

Recipes for Berry Beauty Regimens

12/16/2008

Berries are a practical natural source for all sorts of things. For example, most are wonderful treats for your taste buds, many are used to create colors for natural fabric dying and they are also great to apply topically to your body and face!

And who could dismiss the fact that berries make things taste and smell oh-so-sweet! With that said, here are a few recipes that incorporate berries into the ingredient list. These are some of my favorite recipes to date!

berry lovely

Blueberry Honey Lipgloss

Mmm! What a delicious treat for your lips! I don’t know about you, but I’m up for some all-natural blueberry and honey flavored gloss any day! This recipe is great because the deep purple of the blueberries add a light pink tint to your lips and the honey adds softness. What you need:

8-12 fresh blueberries
1 tablespoon of extra virgin olive oil
1 tsp. honey (try organic!)
1 capsule of Vitamin E (optional).

Once you’ve gathered your items, wash your blueberries and choose 8-12 average sized berries that look the healthiest! Next, combine the honey and oil in your microwave safe bowl. Make sure that it is mixed well. Extra virgin olive oil is very refined oil and great for your lips, but if you find the scent too strong you can trade it out for a vegetable oil of your taste.

After the honey and oil are mixed thoroughly, add your blueberries and heat in the microwave. Keep a close eye on the contents while they are heating. About ever 20-30 seconds, take the bowl out and stir. Continue to do this until the mixture begins to boil.

With a spoon, crush the berries.. The liquid portion of the mixture should turn to a pinkish color. Continue to mix until the berries are fully crushed. Remove what is left of your berries either by straining or by picking them out. Stir until everything is smooth and consistent.

You can store this fabulous gloss in an already-used lip gloss container or purchase a container at a craft store. Cool, huh?

Strawberry Cream Rouge

I’m totally obsessed with this recipe! Not only are DIY blush recipes hard to come by, but this one looks fabulous, moisturizes your face and is super easy to make. You’ll be shocked into happiness with this baby! Before you begin, gather these items:

2-4 strawberries (you’ll want 1/2 cup chopped)
1/4 cup of beet powder
1/2 teaspoon of extra virgin olive oil

First, select 2-4 strawberries that look the healthiest! Wash them and cut off any blemishes. Gently dry them off and chop into small pieces. You should have 1/2cups worth. Next, combine the strawberries with the beet powder and olive oil in a blender. Blend on medium until everything is smooth and consistent.

You can store this creamy blush in an already-used container or you may purchase one from a craft store. To apply, dab a small amount on the apples of your cheek and blend in. You’ll be a glowing, strawberry-lovin’ diva!

So Berry Bright Mask

The scents from this face mask will leave your mouth watering. Feel free to drink a glass of champagne with this recipe! Here’s the ingredient list:

1/2 cup almonds
1/2 medium sized cucumber
3 strawberries
1 tsp. honey
1 tsp. plain yogurt

Combine all the ingredients into a blender and blend on medium setting for 2-3 minutes. Depending on your blender you may need to blend a bit longer. Make sure that the mixture relatively smooth and consistent (the almonds will make it a bit rough, though).

Cleanse your face with your normal face wash and pat dry. Apply this mixture to your face and let it set for 10-15 minutes (or until it is dry). Once you’re ready to rinse, do so with warm water. Splash cool water on your face to tighten pores and then gently pat dry. Take a look in the mirror – that’s one berry fabulous chic!

DIY Recipes

Rainbow Gelatin Cake Recipe

12/15/2008

Creamy, delicious color topped with color upon color, reach the moon if you must! This cake is absolute fantasy land in a kitchen. If you take the rainbow challenge, please show us how it goes! The only thing better than eating rainbows is gazing upon them~

Rainbow Jello Cake

Feel free to print this for your recipe book/box and keep it close by for celebrations of the colorful sort.

DIY Recipes

The Mushroom Forest Tales and Recipes

12/06/2008

Mushroomaholic? Yes please. I’m an absolute mushroom lover from both a visual and a taste stance. I still enjoy walks in the woods looking for tasty morels. (it wasn’t long before I cooked and ate the one you see above) I come from a family/culture that appreciates the earth and that mushrooms are possibly the tastiest gift of all. If you happen to spot some mushrooms along your trails, please post your own mushroom photos and collections for the MUSHROOM GALLERY (coming soon!).

Enjoy these vintage Moonlight Mushroom scans about a mushroom garden in Pennsylvania for some smiles and recipes. What a cute thrift store score!

100% moonlight

moonlight mushrooms

hors d'oeuvre


Remember never to eat a mushroom you have found in the wild unless you are experienced in mushroom identification!

DIY Recipes

Holiday Cocktail Recipes to Warm Your Winter

11/25/2008

Isn’t it nice how a fabulous cocktail sets the entire mood of a party? After all, when you have a good-looking and great-tasting drink in your hand, your mood is generally soarin’ high!

Listed below are seven simple (and inexpensive) holiday cocktails that you can make without breaking the bank.

holiday cocktails

Cranberry Christmas

This delicious and fruity cocktail is the perfect shade of crimson. Here’s what you need:

1/2 ounce Cointreau
1/2 ounce cranberry juice
1 teaspoon lime juice (squeeze it fresh for the best taste)
1 oz vodka

Combine all the ingredients into a cocktail shaker, add ice and shake. Serve in a frosted martini glass (just place it in the freezer for a few hours). To garnish, add a few cranberries – they’ll float!

Peppermint Delight

The holiday’s are always nicer with a hint of mint. Try this lovely and refreshing mix at your next holiday bash:

1.5 ounces creme de cacao
1 ounce half/half (try lowfat milk if you’re on a diet)
1 ounce peppermint schnapps

Place in a cocktail shaker with ice and mix well. Strain and place into a beautiful glass of your choice. To garnish, add a short peppermint stick!

Let it Snow

This intoxicating mixture is an interesting wake up call for your taste buds.

2 ounces pear Shnapps
1 ounce half/half (or milk)
a dash of cinnamon

Place the Schnapps and cream into a cocktail shaker with ice. Mix thoroughly and strain into a fabulous glass. You can also try this drink blended. Simply combine the Schnapps and cream with ice and blend until smooth. Sprinkle the cinnamon on top!

Scotch Reindeer Sour

This drink is especially fab for the gentlemen on hand. Serve this in an old fashioned, short glass and hand it over with a coy eye!

1 1/2 ounces whisky (try the Canadian kind!)
1 1/2 ounces orange juice
1 teaspoon of grenadine
1 teaspoon fresh squeezed lemon juice.

Combine all the ingredients into a shaker or blender. Pour into your glass and add a lemon slice to garnish!

White Christmas

This silky drink is better than any dream you could conjure! Not to mention, it’s as easy as 1-2-3!

1 ounce amaretto
1 ounce half/half
1 ounce vodka

Mix this lovely trio in a cocktail shaker with ice. Strain into a chilled cocktail glass and garnish with a cherry or nutmeg.

Mr. Grinch

Maybe this drink won’t steal all your presents, but it sure knows how to steal hearts!

2 ounces Midori
1/2 ounce fresh squeezed lemon juice
1 tsp sugar syrup (try Karo)

Mix all three ingredients into a shaker and strain into a chilled martini glass. This green drink looks fabulous with a cherry garnish!

Hot Mint Chocolate

This is my all-time favorite, so of course I’ve saved the best for last! This drink is great for low-key parties or snuggling up with your loved one(s).

5 to 6 ounces of hot chocolate (hot!)
1 ounce peppermint schnapps

Pour the schnapps into a mug or glass that is heat-safe. Add your hot chocolate and stir well. To garnish, add crushed candy cane around the rim of your glass or simply add a candy cane stick.

DIY Recipes

Teacakes to Bake in the Microwave

11/10/2008

Have only a few minutes or a tiny-kitchen but want to make a yummy cake for yourself or friends? Make sure after you’ve finished the cake to pop a few coffee mugs with water for 1.5 mins and add your favorite tea to each cup!

Applesauce Cakes

Ingredients
microwavable coffee mugs or similar
non-stick spray or butter
mixing bowl
flour: 1 1/2 cup
baking soda: 1/2 tsp
salt: 1/2 tsp
cinnamon: 1 tsp
cloves: 1/2 tsp
nutmeg: 1/2 tsp
allspice: 1/2 tsp
shortening: 1/2 cup
packed brown sugar: 1 cup
egg
unsweetened applesauce: 1 1/4 cup

Instructions
Line a 1 1/2 quart glass baking dish with wax paper. Sift flour, baking soda, salt and spices together into bowl. Cream shortening and brown sugar into mixture. add egg and beat thoroughly. Mix well after each addition. Fill greased mugs half-way with batter. Bake in microwave for 10 minutes.

Cheesecakes

Ingredients
microwavable coffee mugs or similar
non-stick spray or butter
mixing bowl
package of cream cheese: 8 oz
sugar: 1/4 cup
egg
vanilla wafers or cookies
vanilla flavoring: 1/2 tsp

Instructions
Soften cream cheese. Mix in other ingredients and beat well until smooth. Place vanilla wafer or cookie in microwavable coffee mug or tea cup. Spoon cheese filling on top and microwave on high 1 1/2 to 2 minutes until filling is set. This will make 6 cakes. when cool, top with pie filling or piece of fruit.