Browsing Tag

frame

Crafts DIY

Let’s Start Decopatching!

11/08/2011

That’s right, I said decoPATCH not decoupage! If you’d like to know the difference between the two, this article is a great place to start.

I decided for this article I would need something around the house that needed a makeover so I found a natural wooden frame, a table worn on the top and an empty cocoa tin.

If you want you can use actual decopatch paper, glue and sealant but I did this with things I had around the house.
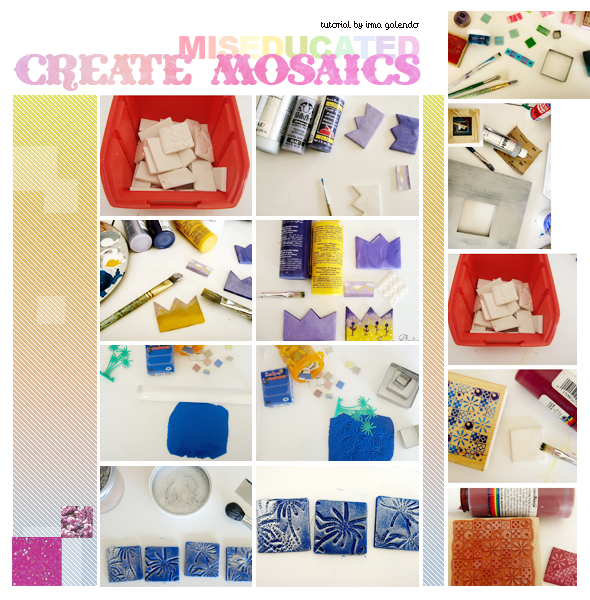
You Need

  • Mod Podge (glossy)
  • Paper scraps
  • Something to decopatch

decopatch scraps

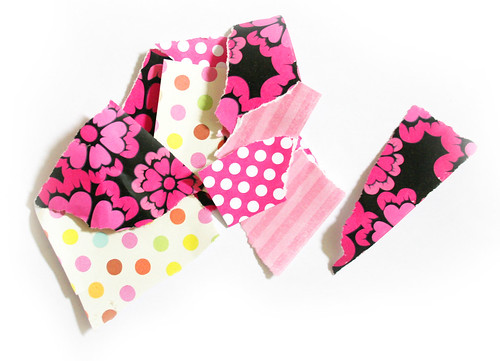
First I collected torn pieces of paper that sort of followed a theme. My theme was kitschy-sweet as usual. Too excited but nervous to start with the table I decided to start with some junk I had saved, a cigarette box and an ATC-sized (2.5 x 3.5 inches) card. I used the same thin paper for each that I had torn into small and medium-sized pieces. Then I covered my box/card in Mod Podge (glue) (I know there’s decopatch glue and varnish but I’m a Mod Podge addict.) and smoothed down the strips of paper. Last I covered the paper in a layer of Mod Podge (varnish) and let it dry. How easy was that?

Next it was time to try my luck on the tin. I tore out assorted pieces of paper this time and followed the same instructions above. Now I have a kawaii place to keep tea, coffee and small things.

tea tin


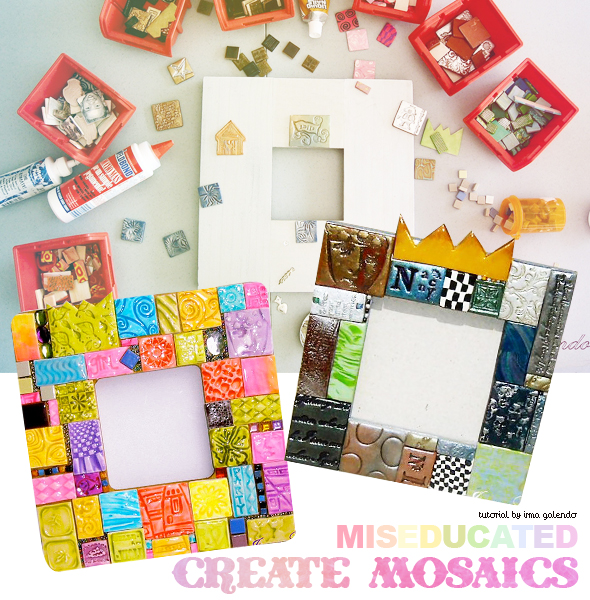
Stay tuned for next time when I’ll be decopatching a frame and table with decopatch paper from France.

Crafts DIY

Create Your Own Mosaic Frame

04/14/2009

Before you begin

Choose boxes or frames “unfinished”; paint them with acrylic paint gold or silver (or whatever color you want, depending on your color scheme) just to have a base for the tiles to stick to. I don’t like to show raw wood between tiles because I don’t use grout in between the tiles (too messy and may scratch). Paint back and edges.

Create Mosaics

Supplies

Polymer clay (various colors)
Acrylic roller and/or pasta machine
Cookie cutters and craft blade
Stamps ( rubber or any texture you find around your house)
Acrylic paint and brushes
Metallic powders
Varnish for polymer clay
Glue (Liquid nails or Weldbond are good)
Oven (don’t use you home oven)

Creating Mosaics

Paint white tiles as if they were little canvases using acrylic paint.. get creative! Use more than one color. Paint a single tile with multi colors or a landscape, try to make small pictures.. tell a story.

Mosaics with Texture

Cut the polymer clay until desired thickness, approx. 3mm ( see picture ). Gently stamp with your texture (I use toy palms in this case, you can use any texture like buttons, stamps, texture sheet, etc ). You can use mica powders or metallic powders to enhance the texture, then cut my tiles with the cookie cutters or a blade (squares are easy to arrange on you frame). I bake them following the instructions for the polymer clay brand. I don’t like to use a regular oven (fumes).

Mosaics with Stamps

Paint white tiles with acrylic paint, before they dry gently stamp them, it will take the paint off the tile creating a negative image of the stamp. Use rubber stamps for this and wash them after each use.

Making the Mosaic Mirror

I classify the mosaics by color, so they are easy to arrange when designing the mirror.
Arrange tiles on the frame as a puzzle and when you like the composition glue each tile. You may use ceramic tiles, milagros, beads, etc. just to have different textures and fill spaces when I don’t find the correct size of tile.
The last step is varnishing the tiles.

Use your imagination and have fun!

Create Mosaics