Browsing Tag

diy beauty

DIY Recipes

Egg Beauty Recipes for Eggstacy

05/06/2009

We all know that eggs are a great food source and mega healthy for your body. But did you know that the all-natural item is also beneficial for your skin? In fact, egg whites clear up/prevent acne and blemishes, tightens skin and decreases signs of age.

Here are a few egg*y DIY beauty recipes for you to try at home! I promise, these recipes will yield products just as good (if not better) than any spa could provide you!

diy egg beauty

Chilled eggs and honey face mask

This cool face mask is great for dry skin. It’s soothing and moisturizing! Here’s what you need:
1 egg
1/2 cup coconut oil
1 tbs honey

(1) Heat your coconut so that it is warm, but not too hot. You can do this in a microwave save container in your microwave or over the stove at a low-medium heat.
(2) The first thing you need to do is crack your egg open into a small bowl. Beat the egg until it is foamy and consistent in texture.
(3) After you’ve finished stirring the egg, gradually add your warm coconut oil. Doesn’t it smell delicious? Next, add your tablespoon of honey. Beat all of these ingredients until you have a semi-thick consistency (similar to mayonnaise).
(4) This next part will sound a little strange! Use an empty toilet paper roll and place one end into a bowl. Put your mixture inside of the roll and place it in the freezer. Remove the roll once the contents inside are completely frozen!
(5) Once it’s frozen, peel part of the toilet paper roll away (about 1/4 inch) and apply to your face, rubbing it around in a circular motion. It should resemble a frozen popsicle! Let the contents sit on your face for about 10 minutes and then rinse with warm water. Splash your face with cold water to tighten pores and gently pat dry.

*You will have plenty left over for future-use! Simply cover with a plastic bag and place in the freezer again.

Moisturizing Egg Yolk Hair Mask

This recipe is super easy and a great cure-all for dry hair, dead/split ends and frizz issues! Gather these items before you begin:
1 egg yolk
1 cup milk
1/2 tbs. rosewater (optional)

(1) Separate the egg yolk from the egg white and place in a small-medium sized bowl. Beat the yolk until there are lots of little bubbles on the top – it should be frothy looking!
(2) Gradually add the milk in. If you have rosewater, you may add the 1/2 tbs. at this time. Mix all of the ingredients together until you reach a consistent texture.
(3) Apply the mixture onto your hair, starting with the ends (which tend to be the driest). Work your way up until your hair is fully coated.
(4) After 15 minutes, rinse the egg mixture from your hair with tepid water (if it’s too hot you’ll end up with scrambled egg-yolk hair). Make sure you remove everything!

Shine Reducing Egg and Lemon Treatment

This treatment does wonders for a tired and/or oily face. Not only does it firm and tighten skin but it also reduces shine. Here’s what you need:
1 egg white
1 medium sized lemon

(1) Separate the egg white from the egg yolk and place in a small-medium sized bowl.
(2) Cut the lemon in half and squeeze out the juice into your bowl. Remove any seeds that may have danced their way into the bowl!
(3) Whisk the lemon juice and egg until it is completely blended. The texture should be smooth and consistent.
(4) Apply the concoction onto your face and let it set for 15 minutes. Once it’s hard and flaky, rinse the mixture from your face with warm water. Splash your face with cold water to tighten pores and gently pat dry.

You may follow up with your nightly moisturizer.

Good luck and happy beauty!

DIY Recipes

Vinegar Beauty Recipes for Vamps

03/26/2009

When it comes to DIY Beauty, recipes using vinegar are all the craze. Why? Because vinegar does an excellent job of cleaning, polishing and wiping away impurities. In addition, vinegar is easy to come by, inexpensive and always practical. Here are a few recipes to give a try the next time you’ve got vinegar to spare and money to save!

diy vinegar beauty

Apple Vinegar Hair Rinse

After using various products and chemicals on your hair, it tends to become dull, lifeless and not too healthy. A major culprit of this is product build up. This recipe does wonders for that dilemma and should be done once a week. Here’s what you need:

1 small-medium lemon
2 tablespoons apple vinegar
2 tablespoons warm water

In a small bowl, combine your water and vinegar. Cut your lemon in half and squeeze out the contents of half of it. Make sure to remove any seeds that escape! Mix thoroughly and let it set for 5-10 minutes while you’re washing your hair. After washing your hair in the shower, apply this mixture thoroughly. Let it set for 2 minutes and then rinse out with tepid water (cold if you can bare it).

Vinegar Astringent for your Face

This is great for oily, acne-prone skin and can be whipped up in a flash. All you need is water and a little vinegar and you’re all set. Here’s the specifics:

1 tablespoon apple cider vinegar
2 tablespoons warm water
Cotton balls

Combine both ingredients and dip your cotton ball into the mixture. After using your regular face wash, apply this evenly by wiping the cotton ball around your face. Let it set for 10 minutes and then rinse thoroughly with cold water to tighten pores. Gently pat dry.

Strawberry Vinegar Face Mask

This sweet treat makes your skin glow and is easy to prepare. Gather these items:

5-6 medium sized strawberries
1 tablespoon apple cider vinegar
1 egg white

First, separate your egg yolk from your egg white into a medium sized bowl. In a separate bowl, mash your strawberries until they are relatively smooth/consistent. Add the egg white to your strawberries and mix well. Gradually add the vinegar and stir until you have a nice paste.

After washing your face with your typical face wash, apply the mixture generously onto your face. Let it set for 15 minutes and rinse with warm water. Splash cold water on your face to tighten pores and gently pat dry.

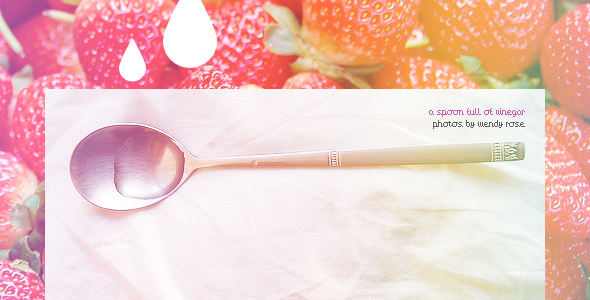
spoon full of vinegar
DIY Recipes

Sensational Seaweed and Beauty Recipes

03/05/2009

Seaweed is one of the healthiest things out there and it can do wonders for your hair, skin, nails and body. You can often find seaweed in the exotic food section of your grocery store or seaweed products (ie. Kelp, dulse, nori, sea lettuce) at a health food store/online. The following are great DIY beauty recipes that you can prepare and use in the comfort of your own home.

seaweed

Seaweed Detox Wrap

This recipe cleanses your body of all unnecessary that build up by simply walking around. It also relieves stress, slims and is a lovely treat after a long day at work. Here’s what you need:

8 ounces powdered seaweed (kelp is easiest to find)
1 cup hot warm water
2 plastic sheets (saran wrap works well).

Before you begin, prepare your bathroom for the wrap treatment. I like to lay a blanket down in the bathtub, light a few candles and let hot water run for a while to get that steamy effect (if you run water in the bathtub, lay the blankets down afterward obviously). I’ve also heard of people putting space heaters in the bathroom to keep it warm.

Next, set your plastic sheets out (or sarah wrap) so that it’s ready to go. To prepare the seaweed past, simply pore the powdered seaweed of choice into a medium sized bowl. Next, add a little bit of a water at a time and stir. Do this until you have reached a consistency that is not too thick but still applicable and will stick to your skin.

Apply the mixture to different areas of your body, such as your stomach, arms, legs, feet. Wrap with the plastic sheet or saran wrap and sit in the bathtub under a second blanket. Listen to soothing music or sip on tea for 20 minutes. Next, remove the plastic wrap and soak in the bathtub for 10 minutes or so and rinse all the residue away. Apply lotion as desired and relax for a little while longer.

Lavender and Seaweed Bath Tea

I love this recipe because you can make it in bulk and it serves as the perfect gift. Here’s what you need:

Tea bags (or tea filters)
1/2 cup dried seaweed (kelp, seaweed flakes, nori)
1 cup dried lavender

Once you’ve gathered the ingredients, mix the seaweed and lavender until you have an even mixture. Next, divide the mixture up into the tea bags and tie (you may need to purchase string depending on the types of tea bags you purchase). Draw yourself a warm bath, light some candles and drop 2 tea bags into the water. After letting it steep for 5 minutes, hop in and enjoy!

Note: If you can’t find teabags in the tea section or your local craft store, try using pantyhose.

DIY Recipes

Citrus Spa Recipes for Your Skin

01/20/2009

Citrus has wonderful affects when applied topically. That’s why fruits like lemons, grapefruits, limes, oranges, etc. are often seen in DIY beauty recipes. Citrus has naturally detoxifying effects when applied to the skin and it also serves as an astringent/toner and antiseptic. The following are three original and delicious DIY Beauty recipes that incorporate citrus*y fruits into the ingredients!

citrus

Grapefruit Toning Facial Mask

This recipe is especially great for those with oily/combination skin. The citrus juices from the grapefruit exfoliates and eliminates extra oil that may accrue over the days time. Oh, and it smells great, too! Here’s what you need to gather:

1 tsp. Grapefruit juice
2 teaspoons honey
6 ounces plain yogurt
8-10 almonds
1 tablespoon rice

Once you’ve got everything together, combine the ingredients in a blender. Blend on high for 1-2 minutes. If you notice that there are large chunks of almonds left then blend again. It may help to crush the almonds pre-blending!

Wash your face with your normal cleanser and pat dry. Apply a generous amount of the mixture to your face and spread it evenly. Let it sit for 15-20 minutes or until it has hardened. Rinse with warm water. Make sure you remove everything – you don’t want yogurt residue on your face! Splash your face with cold water to tighten pores and then gently pat dry.

Cream Cheese / Orange Facial Spread

I love this recipe because if you have any left over it makes a perfect spread for a toasted bagel! It’s a refreshing, creamy blend of goodness that does wonders to your face. Here’s what you need:

1 small-medium sized orange
½ teaspoon lemon juice
1 tsp. honey
2 ounces cream cheese (soft)

In a small to medium sized bowl, combine your cream cheese and honey. Blend thoroughly so that the honey is evening dispersed throughout the cream cheese.

Next, cut your lemon in have and squeeze out ½ teaspoon of juice. Be careful of the seeds! Peel your orange so that you are left with a skinless fruit! Take 2 slices of the orange (you can peel them apart easily) and take off the thin layer of “skin.” Add the lemon juice and peeled orange slices to your cream cheese and mix/mash until you have a smooth and consistent texture.

Your spread is now ready to spread! Apply a thin layer of the concoction to your face and let it set for 15 minutes until it is hardened. Rinse with warm water. Follow up with a few cold splashes (to tighten pores) and gently pat dry!

Pineapple Papaya Acne Treatment

Again, this one is good enough to devour! Papaya is a powerhouse of nutrients and enzymes that work to heal the skin. It does wonders for acne-prone skin. The citrus*y pineapple is a gentle exfoliator and the honey/yogurt work together to moisturize. Round up these ingredients before you begin:

1 cup fresh pineapple (avoid cans)
¼ cup fresh papaya
2 grapes
½ tablespoon honey
1 tablespoon yogurt

After you’ve prepared your pineapple and papaya, take 2 grapes and peel the skin off. In a small to medium sized bowl, mix all of your fruits together, mashing them well so that you have an evenly combined mixture of delicious looking fruit. Try to not to eat any!

Next add to your bowl the honey and yogurt. Mix well and let it set for 10 minutes in the refrigerator. This gives the papaya and pineapple juices time to seep into the mixture.

While you’re waiting, cleanse your face with your normal face wash and pat dry. Next, apply the mixture to your face focusing on those areas where acne is most troublesome (T-zone, chin, etc). Let the mixture set on your face for 20 minutes. Rinse with warm water and gently pat dry. This also works well on other acne-prone parts of your body.