Browsing Tag

Crafts

DIY

Create Your Own Incense & Magical Clouds

08/17/2019

Incense, you either love it or you hate it. That’s what I’ve found in being a lifelong pusher of it!

“Hey, you don’t mind if I burn incense do you?”

Often met with a casual eye-roll or possibly a sure and then, can I put this out? It seems a person either appreciates the presence of it in their home or they despise it because of the sheer invasiveness of the smokey scent. Many times powerfully strong, incense can leave your environment highly fragrant in a matter of minutes.

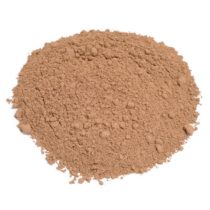
The process of making herbal incense without the use of salt peter, or even charcoal is actually quite easy. However, perfecting the art is another matter. Perhaps the easiest way is by using a binder commonly called Makko. Makko not only serves as a water soluble binder, but as a burning agent as well. Makko is a natural tree bark from an evergreen tree and contains no synthetic chemicals, charcoal, or salt peter.

Incense began use as an instrument in spiritual practices. With the killer scent it packed in such a small size, it also became a hit with hippies and homeowners everywhere. If you can appreciate the presence of lemony-sweet sodapop in your home, or more commonly a woody-spicy fragrance, you’re definitely a contender for incense!

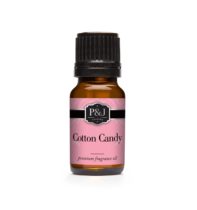
Now, you can buy incense for pretty cheap just about anywhere that sells fragrant candles. If you can’t find it in your area you’re in luck because there’s an even bigger selection online! Be sure to gaze at the carnival of delicious, handmade incense scents on etsy and imagine the sheer wonder of your home or studio being transported to a fragrant fantasy land!

… but if you wanted absolute control over the fragrance you could make your own as well.
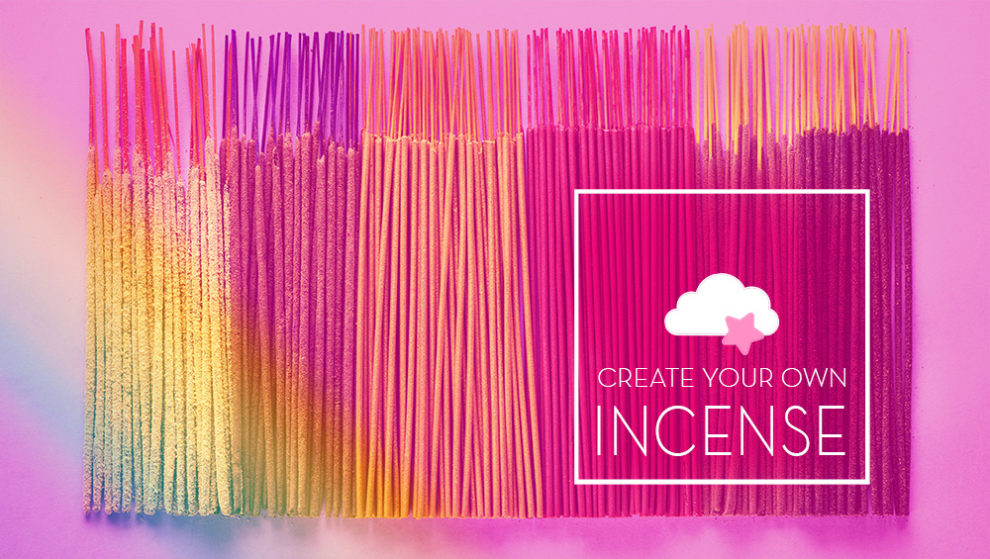
DIY Incense

Now, it sounds very easy to create your own incense but the trick is mixing the ingredients correctly so that you get a nice, even burn. Your incense might be too smokey, might not burn properly and could keep going out prematurely.

To begin making your incense (this is the Japanese way), mix an incense base with makko (incense powder), and add some warm water. When using a resin your incense will become more difficult to burn. Therefor you should use resins, like Frankensense, at much lower percentages as the burning agents (makko and sandalwood).

“Sandalwood is common to almost every incense formula, and serves as a wonderful base aroma as well as a burning agent of its own right. If you were making an incense of sandalwood alone, the amount of makko required may be a little as 10%.”

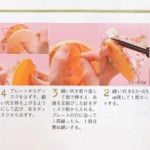
Mix the ingredients into a dough-consistency and knead it thoroughly. Form into cones or sticks (form sticks around bamboo reeds) and Knead the incense-dough thoroughly and form into cones or sticks. Allow them to dry slowly, about a week. Check them to see if they’re dry and enjoy your new incense.

In-SCENTS

My favorite part about candles and incense is the *aroma*, like most people I adore a waft of delicious fragrance to pass by me while working at my desk. It’s a shame you can’t have them in cubicles! It definitely would have lightened the atmosphere in the slightest way. Especially when there happens to be a microwave area in your office.

Don’t use cheap oils — they can irritate the skin and the aroma can provide no benefit.

You can combine your favorite oils to create aromatherapy benefits *or* just to delight your nose.

Incen-spiration

Ehehe.. my favorite part of blogging has always been the eye candy.

lisn_to_finland_5
(By Ilkka Suppanen)

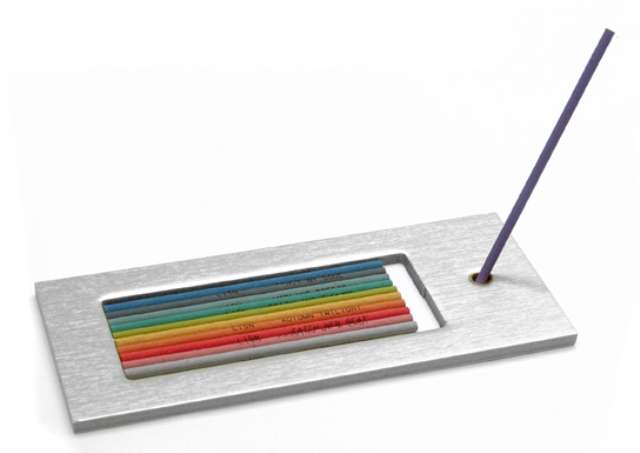
After seeing this incense design exhibit I *had* to find rainbow incense, cute holders, and well-designed incense packages~

cafetime

Japanese incense comes in many shapes in sizes, sometimes with especially cute scents and packing like these Cafe Time incense sticks.
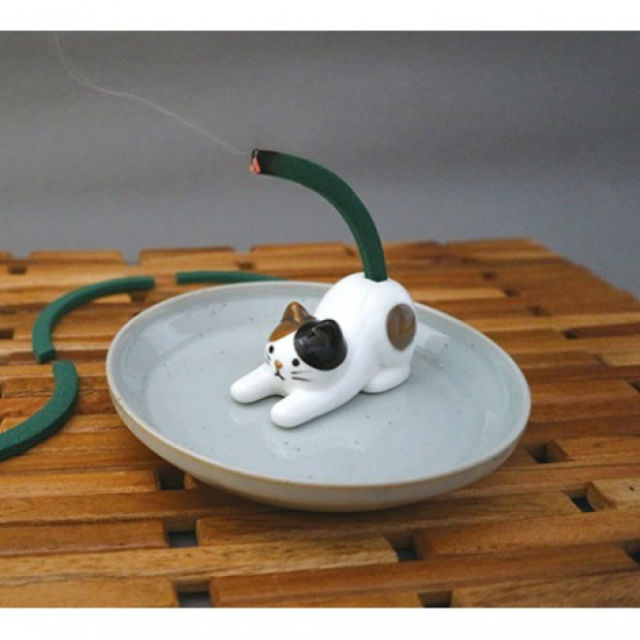
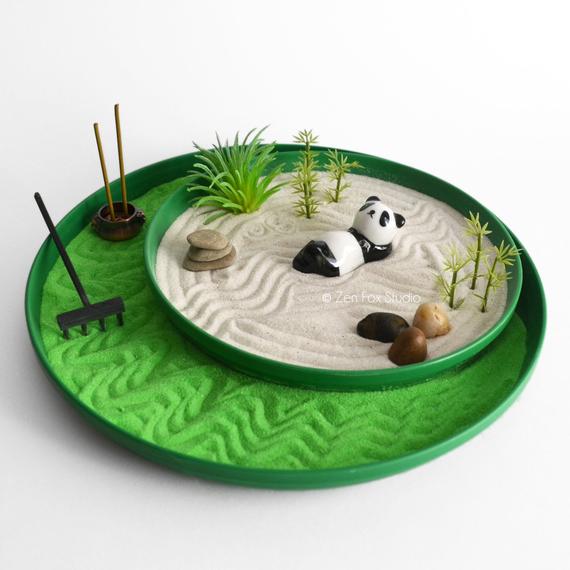
Incense Holders

Now that you have some great incense to try you might want to purchase a cute handmade holder *or* make your own.

Bowl / Teacup Nab a cute bowl or teacup from the local antique shop or use your grandmother’s you’ve been saving in the attic. Fill it with sand, stick your incense in the bowl — add some to the middle or add in a circle around the center. Light and enjoy!

Holder These leave the most ashes but hopefully you’ll have this in an area where ashes can be easily cleaned up! Create a clay sculpture, be it a cupcake, mushroom or anything you like. Grab an incense and stick it into the (still wet) clay where you’d like your incense to be.. Move the incense around a bit to make the hole a little wider. Remove the incense and bake your holder (or let dry if it is no-bake clay).

Tray The typical wooden (or clay) tray is usually longer than the length of the incense stick, has a little ash dip in the middle and a hole on one of the ends for holding the incense. These generally leave ashes scattered also.

Plant That’s right, I often stick a lit stick right in a big, potted plant.

Crafts DIY

Lace for Your Jewelry: Resin Pendant Tutorial

11/15/2018

Resin can be a fun hobby or business for the crafty miseducated diva in all of us. The possibilities are endless, allow your creativity to run wild and create pieces that are quite unique and fun. With some initial prepping steps, you can suspend just about any material in resin.

In this basic tutorial I will be casting jewelry pieces with resin, but you can use resin for whatever else you would like to make like paperweights, coasters, soap dishes and many other things. There are even many different types of resin that can be used, for different types of desired uses.

I myself use a two part casting resin that is pretty user friendly. I am a novice at resin, just learning as I go and getting better each time. Its fun and I thought I would share some basic tips and give crafty divas something new to try…cause like me I know with all this creativity you have inside of you, you always want to try something new. So this is something for you gals who are aching for a new creative outlet.

I chose to cast fabric for the purpose of this tutorial. I have played with sprinkles, glitter, and candy before. So I thought I would try something new, so here goes….

resin

Supplies

  • Easy Cast Resin
  • 2 Plastic Cups
  • 2 Stir Sticks
  • Wax Paper
  • Paper Towels
  • Resin Molds
  • Fabric of choice
  • Mask
  • Gloves
  • Timer

Before hand I prepped my pieces of fabric by cutting them a little smaller than mold shape, and sealed them off with mod podge, or you can use an acrylic sealer if desired.

Instructions

    1. Take a plastic cup and pour in 1 oz. of resin, then pour in 1oz. of the hardener in the same cup, so you end up with 2 oz. total. (Easy Cast has a ratio of 1:1)

    2. Take one of the stir sticks and gently mix the concoction, make sure not to whip as it causes air bubbles. Scrape the sides periodically and mix well for 2 minutes. The mixture will look cloudy at first but this will clear up after resin and hardener are mixed together thoroughly.

    3. Take this mixture and gently pour into your other clean plastic cup. Stir gently again for 1 minute this time. The mixture at this point should be clearer than before.

    4. Set mixture aside for 5 minutes, so the resin can self-degas. Take this time to clean up a bit and get your mold and fabric piece(s) ready.

    5. When ready, pour a little bit of resin into each mold, about a quarter full.

    6. Then place cut fabric, right side down into resin. You can use a toothpick to position and press fabric. This will also help remove any air pockets trapped underneath the fabric that can caused some bubbles.

    7. Then this is where you will need to practice some patience…let the piece(s) rest overnight or for several hours until cured. You can check if it is cured with a toothpick, this way no fingerprints will be left behind.

What I covered in this tutorial are the basics, but you can get more creative by adding different layers. Below are photos of some layer pieces I created, I hope you find them inspiring.

After your pendants are cured, you can jazz them up by drilling holes, adding jump rings, gluing on bails, posts, brooch settings, what ever you like, let your imagination run wild, its all up to you! Your end result will be beautiful and unique pieces.

A great source of reference and inspiration of mine is a book that I turned to when first approaching resin after multiple searches on Google, a book called “The Art of Resin Jewelry” by Sherri Haab. In this book she goes over in detail all different types of techniques with resin, like the so fun and yummy candy jewelry.

Athina’s Creations

See more in my shop here.

Originally published on 12/08/2009.

Visual Splendor

So Little Time, So Many Things to Create

09/14/2015

David has been working in the studio a lot lately.. he has a couple shows coming up and some other art events. So I’ve been working up in my half on making a complete mess. As I said in the last video, I’m doing wedding decor so the studio is not video-ready. It looks instead like someone took a big, pastel puke in the middle of my floor. Really though with all of the glitter, ribbons, pompoms and flowers… it was only a matter of time. I’m making just about everything in the wedding and although it will be pretty minimal, the items I make will be pop surrealism crafty cute~ pastel rainbow = my favorite thing forever.

pastel rainbow wedding

I’ll also be using a lot of these pastel kawaii materials (I got bulk goodies because I found so many great deals on things I LOVE) to make some goodies for the shop but that will probably come around after the wedding is over, maybe not but probably! The shop will be getting a revamp next year due to our new tshirt printer and products getting finalized~

On that notion I also started doing some sketches again in spare time that wasn’t spent crafting. I had painted an entire painting of an alien scene when David left a canvas he didn’t need on my craft table.. and the only thing I liked about it was the HANDS. How often do illustrators feel that way? I’m not sure.. but it’s not common for me. So I wondered why I don’t sketch anymore and how much more fulfilling it would be if I sketched a bunch of my ideas out prior to sketching on a canvas. Like I used to do. So I’ve been doing little sketches of my moods displayed on a cartoon-y girl. I also pulled one into illustrator after David asked why I’m not doing them in Illustrator. Something about the actual sketching (besides the mobility of it) is providing some sort of therapy for me in my late-night busy brain, tired body situations. If I like any enough in the future I might make some prints of them, not sure yet!

night sketching

thinking girl sketch

whatever sanrio pop kawaii bow

deer fawn girl sketch

whatever girl

And I’ve been doing dolly crocheting again while waiting for things like appointments or meetings to start..

kawaii kokeshi crochet

What have you been working on?

Crafts DIY

DIY: Neons vs Pastels » Craftspiration

04/03/2014

Because I can never decide which one is better so all of my pastel-coated paintings always have a little hot pink strewn through-out and same for my collages. Why choose one when you can have both? Have a hot pink Easter.

acd27d96ddd66ad82b3258b806492a10

Easy Neon Hanging Planters Tutorial by Brit + Co

6cf0cdc3e15d511f1ee10652a732d236

Candy Necklace Inspiration by Love the Day

89de91bf10cb582702c376ba53c450f3

Chocolate Surprise Egg DIY for Easter

79e1cffc88b2f91b9975e91b0676942d

Dip Dye Placemats by Design Love Fest

and lastly a breathtakingly beautiful home office and craft studio to inspire you to design your work space to fit your inspiration ala I Love Crafty:

new office 14

new office 31-1

Diary

Crafting a Better Life of Love This Holidaisy

11/17/2013

daisuki
I’ve been feeling a need to write. It’s been awhile that I have felt compelled to write a personal entry but I miss doing such so here I find myself plucking at the keyboard. I don’t often write personal entries these days because of what I’m still going through and an attempt to keep it under wraps mostly until it is long over. I’m still in the midst of a divorce and custody battle and I feel it’s best to keep it to myself and my family in order to protect myself, my ex and most importantly my daughter. It has been very draining to say the least, to start my life again from scratch after I had given most of myself to another for so many years. However even in the midst of this I have found love, happiness and the beginning of a family I always wanted that came easily and without negativity. Our home is filled with love and once everything is over I can fully start a new and devote myself to my new family, the family I had always wanted for myself and Colette.

So anyway, I am living many of the dreams I never really thought I would acquire. I am a housewife of a beautiful man who is a genius realism artist and gorgeous home in the city where I have everything I need to cook decadent meals and delicious desserts for family and friends. I get to spend my days working on beauty and fashion graphic design from my home office while chatting with my boss who becomes a closer friend everyday. I keep only true friends around and the rare free time I have for having fun I get to spend with amazing and creative women (such as Jamie Sucre) chatting and enjoying the finer things in life like sparkling cider, fairy lights and skittle-flavored shisha. I spend my evenings relaxing by the fire and crocheting with my mister by my side, taking a motorcycle ride through the city for a tasty dinner or playing games with our total of 4 children which include tons of laughter and imagination. I’m so inspired by this life filled with love and whimsical creativity and color that I cannot stop creating and planning for new projects for our family and for our work. I get to do many things it seemed I had no time or energy for in the past because I was so down about things I felt I couldn’t change.

halloween13

For instance this year I crafted my daughter’s costume because I couldn’t find a Chibi Moon costume small enough for her size and we dressed up together and Sailor Moon and Chibi for trick-or-treating! It was her first time to actually go and it was a blast. We traveled through the colorful leaf covered sidewalks to houses with lights and faux spider webs to fill our bags with candy. It was like a dream. Then Colette and I hung our tree very early this year, Nov 1, and decorated it with candy sweet adornments. I hung my stocking, sewed a French-y damask one for mister to complement my Versailles style stocking and promptly bought gorgeous, fluffy fabrics for the children’s stockings and embroidered characters on the front. Theirs are still pinned and waiting to be completed but they are oh so excited!

holiday

Winter is my favorite time for yarn crafts as well, don’t you feel the same? I’ve currently got a crochet project going on for Jamie and a knitting project using a magic yarn ball someone made me last year. I was so excited about this yarn ball I saved it until I got settled in my new home so I could look forward to knitting my mother a scarf this winter. It’s not my style of colors and happens to be her favorites: muted forest greens and soft blues and purples all woven together in wool. I’m so taken by this yarn ball surprise I’m crafting one for a penpal friend online and we’re swapping soon so I will be sure to do a feature on that for you to participate in the fun! I feel there was a period in my past I was almost so excited because I spent most of my time crafting things for friends and family while my baby cooed in the background. It’s so fun now that she’s 3 and can actually help me or give me advice on things she likes most. She will always be my little cherub, the center of my heart. She is too perfect and I cannot wait to spend my whole life with her and my soul mate crafting a better life of love, color, whimsy and true, internal happiness which I once thought unreal. I hope you are also feeling reminiscent and content at the end of this year seeing what resolutions you will make and what things you are most grateful for.

hairdye

Also for some random updates I finally got my hair done for the holidays as I had planned, scary change but I felt it was time for a big change to match the way my life has changed. I’ve also become really into American Horror Story on FX — I watched seasons 1 & 2 around Halloween and now I’m caught up with season 3. I had stopped watching horror entertainment for my whole previous marriage because my life felt so chaotic without it. Now that my life is secure and stable for the most part, filled with love and calmness, I have gotten back into horror for fun. What are you into this year? XX

ahs

Crafts DIY

Upcycle Your Soda Pop Can: Ashtrays & Catch-Alls

04/08/2011

Smoking is a bad habit. It causes cancer and, if smoking indoors, can make you and your entire home smell like an ashtray. However if you’re still a smoker and have an occasional cocktail cigarette/cigar then why not decorate your dirty habit with this kitschy ashtray? Actually these don’t have to be used as ashtrays at all they can be catch-alls and candy dishes if you like!

Instructions


Gather scissors and rinse out a new soda pop can (old ones can be sticky!).


Cut the top of your can off — it doesn’t have to be perfect, these ends will be folded under.


Cut the can into thin strips and fold them flat like a daisy.


Turn the can upside down and wrap one strip left and around the one next to it (see photo).
Continue this all the way around the can.


Viola!

DIY Magazine Clips

Fun With Yo-Yos and Japanese Craft-spirations

01/18/2011

I was flipping through some Japanese craft books lately and found a few cute uses for yo-yos that I thought were super cute for the home.

The lampshade is my favorite and I have to try it. What about you? It’s like a yo-yo chandelier.

I’ve always loved yo-yos for some odd reason, a blanket of yo-yos in an array of candy colors and polkadots really makes me drool like no other. These ideas gave me the same reaction!


Crafts DIY

Crafts from Around the Web Vol 2

01/14/2011


Recycle cute containers to make kitschy magnets.
Create a MiuMiu style collar with Audrey.

Create individual cupcake stands with Goldiloks.
Sew bows onto ankle socks for instant cuteness.

Thank you again to each of the authors for your lovely craft tutorials! I’m very interested in featuring other creative blogs as well, there is so much talent on the web that shouldn’t be missed!

Now let’s get creating…

Crafts DIY

Kawaii Crafts From Around the Web

01/10/2011


Recycle old magazines to make thrifty canvases.
Create a plush, retro deer similar to Ayumi Uyama style.

Create Hello Kitty cake pops with Bakerella.
Make a sugary sweet felt coin purse.

Merci to each of the authors for your lovely craft tutorials! I’m very happy to feature these blogs because they really excel at creating visual, eye-candy heavy tutorials and I know you Miseducated readers will love them as much as I do!

Now let’s get creating…