Browsing Category

DIY

Colorful projects that will inspire you to create.

DIY

DIY Interior Ideas for Your Spare Room

12/07/2008

Those of us who are fortunate to have a spare bedroom know that figuring out what to do with it can be tricky. More often than not, this room is a sight for sore eyes – full of random “keepsakes” and loads of junk. Either that or it’s a combination of an office and work out area (that just so happens to have a bed in it).

spare rooms

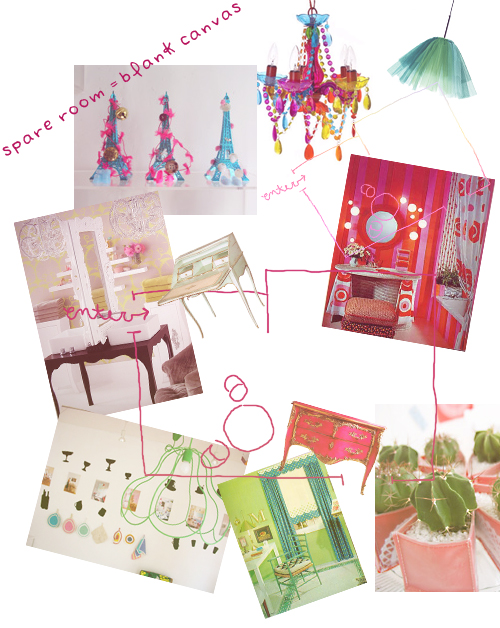
Here are a few ideas to help jump start your thinking process. See if any catch your eye!

An at-home Gym

How many times have you intended to work out after/before work but didn’t end up making it to the gym? Well, a home-gym is a great way to motivate you to work out. After all, it’s hard to get up early enough to drive to the gym and the last thing you want to do after a long day at work is head off to your local work-out facility.

An at-home gym is convenient for many reasons and you’re more likely to use the machinery if you’ve got a nice room designated for such activity!

A quiet/relaxation room

This room should whisper “serene” every time you walk inside it. Paint the walls a muted color that’s easy on the eyes. Fill it will soft, plush furniture, candles and lots of books or drawing/painting supplies. An indoor water fountain would be a great addition, too. Allow yourself to melt away in this sacred space with books, crafts, meditation and even sleep.

A toy room for children

If you have children who frequent your house, this is a great idea. Paint the walls a cheery color and even add some bright/child-like decals on the wall. I remember my grandmother’s playroom had several dresses filled with dress-up clothes, jewelry and accessories. Add a few books shelves and lots of stuffed animals/games. Another benefit of having a special room for children to play in (aside from you playing in the room and pretending you are a kid again) is that the mess stays there. Also, everything has its place so it’s easier to tidy up when they are finished playing.

spare room

A bar lounge

Turn your spare room into a bar/lounge, especially if you like entertaining company! It’s completely utilitarian and inspires you to invite guests, too! Make sure you have seating (be it around a table or casual lounge chairs/sofas) and plenty of sturdy tables to place drinks and food. Create a room that allows people to move freely, schmooze and relax. Avoid placing a TV in this room as it’s not conducive to conversation!

A gaming room

This is targeted to the gentlemen reading, but even a woman can enjoy a game room! Add a pool table, air hockey or a foosball table as your main feature and then add other games, too. Be sure to include a nice table for playing board games! You could go retro with arcade games or old Nintendo or you could jump into the future with more up-to-date gaming consoles (like the Wii). This is great for entertaining and sure to be a hit with friends and family.

A movie room

Whether you’re a movie buff or simply like to watch movies, go all out with this one! If you have the means, purchase a nice television and surround sound system. Add (really) comfortable sofas or chairs that are great for movie-watching and a few tables to set food/drinks. As for decoration, you could go with a genre theme. For example, a 40s theme with lots of movie posters, quotes, etc.

A library

This is great for those of us who always have our nose in a book! It’s also nice for those who wish their nose was in a book more often! Make this room one that you can relax in. Soft colors, plush seating and great lighting. Then, add lots and lots of bookshelves and fill those babies with books! You can even organize the books however you like: by genre, by author, etc. One thing that may be interesting for decoration is framed book covers or pictures of your favorite authors!

DIY Recipes

The Mushroom Forest Tales and Recipes

12/06/2008

Mushroomaholic? Yes please. I’m an absolute mushroom lover from both a visual and a taste stance. I still enjoy walks in the woods looking for tasty morels. (it wasn’t long before I cooked and ate the one you see above) I come from a family/culture that appreciates the earth and that mushrooms are possibly the tastiest gift of all. If you happen to spot some mushrooms along your trails, please post your own mushroom photos and collections for the MUSHROOM GALLERY (coming soon!).

Enjoy these vintage Moonlight Mushroom scans about a mushroom garden in Pennsylvania for some smiles and recipes. What a cute thrift store score!

100% moonlight

moonlight mushrooms

hors d'oeuvre


Remember never to eat a mushroom you have found in the wild unless you are experienced in mushroom identification!

DIY Recipes

Holiday Cocktail Recipes to Warm Your Winter

11/25/2008

Isn’t it nice how a fabulous cocktail sets the entire mood of a party? After all, when you have a good-looking and great-tasting drink in your hand, your mood is generally soarin’ high!

Listed below are seven simple (and inexpensive) holiday cocktails that you can make without breaking the bank.

holiday cocktails

Cranberry Christmas

This delicious and fruity cocktail is the perfect shade of crimson. Here’s what you need:

1/2 ounce Cointreau
1/2 ounce cranberry juice
1 teaspoon lime juice (squeeze it fresh for the best taste)
1 oz vodka

Combine all the ingredients into a cocktail shaker, add ice and shake. Serve in a frosted martini glass (just place it in the freezer for a few hours). To garnish, add a few cranberries – they’ll float!

Peppermint Delight

The holiday’s are always nicer with a hint of mint. Try this lovely and refreshing mix at your next holiday bash:

1.5 ounces creme de cacao
1 ounce half/half (try lowfat milk if you’re on a diet)
1 ounce peppermint schnapps

Place in a cocktail shaker with ice and mix well. Strain and place into a beautiful glass of your choice. To garnish, add a short peppermint stick!

Let it Snow

This intoxicating mixture is an interesting wake up call for your taste buds.

2 ounces pear Shnapps
1 ounce half/half (or milk)
a dash of cinnamon

Place the Schnapps and cream into a cocktail shaker with ice. Mix thoroughly and strain into a fabulous glass. You can also try this drink blended. Simply combine the Schnapps and cream with ice and blend until smooth. Sprinkle the cinnamon on top!

Scotch Reindeer Sour

This drink is especially fab for the gentlemen on hand. Serve this in an old fashioned, short glass and hand it over with a coy eye!

1 1/2 ounces whisky (try the Canadian kind!)
1 1/2 ounces orange juice
1 teaspoon of grenadine
1 teaspoon fresh squeezed lemon juice.

Combine all the ingredients into a shaker or blender. Pour into your glass and add a lemon slice to garnish!

White Christmas

This silky drink is better than any dream you could conjure! Not to mention, it’s as easy as 1-2-3!

1 ounce amaretto
1 ounce half/half
1 ounce vodka

Mix this lovely trio in a cocktail shaker with ice. Strain into a chilled cocktail glass and garnish with a cherry or nutmeg.

Mr. Grinch

Maybe this drink won’t steal all your presents, but it sure knows how to steal hearts!

2 ounces Midori
1/2 ounce fresh squeezed lemon juice
1 tsp sugar syrup (try Karo)

Mix all three ingredients into a shaker and strain into a chilled martini glass. This green drink looks fabulous with a cherry garnish!

Hot Mint Chocolate

This is my all-time favorite, so of course I’ve saved the best for last! This drink is great for low-key parties or snuggling up with your loved one(s).

5 to 6 ounces of hot chocolate (hot!)
1 ounce peppermint schnapps

Pour the schnapps into a mug or glass that is heat-safe. Add your hot chocolate and stir well. To garnish, add crushed candy cane around the rim of your glass or simply add a candy cane stick.

DIY Recipes

Make a Colorful Malaysian Layer Cake

11/22/2008

These lovely cakes are created with intricate layers of alternate color, flavor and texture. The name, which is Malaysian, translates to layer cakes. These cakes are not always sweet and many times have very creative flavor combinations.

The bases of these cakes are usually made from rice flour, glutinous rice flour, tapioca flour and green bean flour. These flours give the cakes a firm pudding-like texture.

If you do take the Kueh Lapis feat and bake a layer cake, please submit a photo and it will be added here~

Kueh Lapis

Instructions

1. Boil 225ml coconut milk with sugar & pandan leave until sugar dissolves
2. Separate mixture into two portions
3. Add red coloring to one portion
4. Pour a thin layer of batter into aluminium tray and steam till set
5. Pour into a bamboo steamer
6. Alternate the colors and steam until batter almost finished
7. When last layer is to be poured in, add a little more coloring into batter to give it a deep red color, pour this over as the last layer and steam

Cake

160g rice flour
20g green bean flour (lek tau hoon)
150ml water

Syrup

190g powdered sugar
300ml water
2-3 pandan leaves (if none, green food coloring)
250ml thick coconut milk
1/4 tsp salt
A few drops red coloring

Method

Combine sugar, water and pandan leaves (food coloring) in a saucepan. Bring to a boil to dissolve the sugar. Strain and set aside to cool.

Put rice flour and green bean flour into a large mixing bowl. Pour in water gradually and leave aside to soak for 40–45 minutes.

Add coconut milk and salt to the rice flour and mix well. Stir in syrup. Strain the batter to ensure it is free from lumps.

Divide batter into two. Leave half a portion white and add coloring to the other half.

Place a greased 20cm tray in the steamer and heat up for 4–5 minutes. Pour half cup of the white batter on the heated tray.

Cover and steam over medium heat for 5–6 minutes or until set.

Pour half cup of the pink batter over the white layer and steam covered for 5 minutes.

Repeat the procedure, alternating white and pink batter until all the batter is used up.

To the very last layer add a little more color to make it a deeper shade of pink.

After the final layer is set, steam the kuih for a further 12–15 minutes. Halfway through open the lid to release the steam, then cover again until the end of the steaming process.

Serve

Make sure the kuih lapis cools completely before attempting to cut (will break apart if cut when warm); cut into diamond shapes.

Crafts DIY

Do-it Yourself Holiday Gifts

11/14/2008

If you can’t find me on any given Saturday afternoon, I’m likely perusing the aisles at my local flea market or antique store. You see, since I was a wee thing, I’ve been obsessed with all things old and lovely. And what better place to find “old and lovely” than at a store that sells items of the past?

Remember, the difference between flea markets and antique stores is this: Antique stores have done the dirty work for you and have found the best of the best vintage doo-dads. As a result, their prices are higher. Flea markets, on the other hand, are a composite pile junk-things and fabulous finds. Consequently, the prices are much lower.

With that said, I find pleasure in both types of stores. However, I personally feel that flea market browsing is a much more satisfying experience. It’s like I’m a superwoman saving all these beautiful items hidden among the rubble! If flea markets are the way you want to go, keep in mind that it takes patience and a lot of time to have a successful shopping trip.

Now, without further ado, here are a few unique ideas that are half DIY, half vintage-fab. And I promise, they are oh-so-easy to do!

The Candy Dish

I promise that any flea market/thrift store/antique mall will have myriad exquisite dishes. In fact, these items are one of my most favorite to look for, simply because they are easy to find and almost always affordable and different. The best candy dish finds are the ones that have a lid (helps keep the candy fresh!) and are one-of-a-kind. For example, I once purchased a fabulously decadent, blue-glass dish that floated on a stem. Once you find the perfect dish that fits the receivers personality, add some of their favorite candy! Individually wrapped chocolates are always a hit!

Framed Vintage

You can frame pretty much anything you want, but one of my favorites is either sheet music or old magazine ads. These items are usually very inexpensive ($1-$5 on average) and offer a great variety of styles. Just browse through the selection and set aside the items that speak to you. Now that you’ve got your item, all you need to do is frame it. Depending on the recipient and the item to be framed, I like to purchase a modern-looking frame to offset the vintage look or purchase an older frame to drive the point home!

Tip If you can’t bring yourself to tear a page out of a magazine, simply make a color-copy!

The Vase

Vases are another easy find at any thrift store, flea market or antique mall. And just like the candy dishes, there is often a great variety in style and color. I am often drawn to opulant items and so for me, the fancier the better! Since you are purchasing for someone else, try to find a vase that reflects the personality of whoever is receiving the gift.

Once you’ve purchased the vase, head to your local flower shop with the vase (clean it up first, of course!). Ask the shop owner which flowers would look best in the vase and go from there.

Tip You don’t have to buy a large bouquet. A few flowers in a beautiful vase makes a bold statement.

Cookie Jar Frenzy

Who doesn’t love cookies? And if you have cookies, why not store them in a beautiful cookie jar? On your next vintage-outing, search high and low for some interesting jars. I’ve seen plenty in my day, ranging from refined and exquisite to gaudy and fun!
Once you have your jar purchased, clean it out and make a batch of the recipients favorite cookies.

Tip To add more vintage snazz to this gift, put the recipe for the cookies on a vintage inspired (or actual vintage) recipe card and include it with the gift!

Sweet Tea Cup

This is one of my favorites. All you have to do is find a lovely tea cup and saucer set. These are usually priced quite low – anywhere from $4 to $25. After you find the cup and saucer of your dreams, purchase some nice tea bags and a few honey sticks. Put said items in your tea cup and wrap the cup/saucer in tinted (or clear) cellophane. You can usually find cellophane at craft stores (I know Target sells some, too). I like to add a ribbon bow at the top for an extra touch of pretty.

DIY Recipes

Teacakes to Bake in the Microwave

11/10/2008

Have only a few minutes or a tiny-kitchen but want to make a yummy cake for yourself or friends? Make sure after you’ve finished the cake to pop a few coffee mugs with water for 1.5 mins and add your favorite tea to each cup!

Applesauce Cakes

Ingredients
microwavable coffee mugs or similar
non-stick spray or butter
mixing bowl
flour: 1 1/2 cup
baking soda: 1/2 tsp
salt: 1/2 tsp
cinnamon: 1 tsp
cloves: 1/2 tsp
nutmeg: 1/2 tsp
allspice: 1/2 tsp
shortening: 1/2 cup
packed brown sugar: 1 cup
egg
unsweetened applesauce: 1 1/4 cup

Instructions
Line a 1 1/2 quart glass baking dish with wax paper. Sift flour, baking soda, salt and spices together into bowl. Cream shortening and brown sugar into mixture. add egg and beat thoroughly. Mix well after each addition. Fill greased mugs half-way with batter. Bake in microwave for 10 minutes.

Cheesecakes

Ingredients
microwavable coffee mugs or similar
non-stick spray or butter
mixing bowl
package of cream cheese: 8 oz
sugar: 1/4 cup
egg
vanilla wafers or cookies
vanilla flavoring: 1/2 tsp

Instructions
Soften cream cheese. Mix in other ingredients and beat well until smooth. Place vanilla wafer or cookie in microwavable coffee mug or tea cup. Spoon cheese filling on top and microwave on high 1 1/2 to 2 minutes until filling is set. This will make 6 cakes. when cool, top with pie filling or piece of fruit.

Crafts DIY

Easy, Colorful Jewelry and Plasticandy Bracelets

11/10/2008

I guarantee if you enjoy making cute, simple items this has been or will become your new favorite hobby. Preferably when drinking, relaxing, listening to records grab out your big bowl of pony beads and plastic jewelry bits. Grab some elastic cord, elastic string, invisible elastic, etc~ make sure it’s stretchy and not annoying to work with. Go to a craft shop and look in the bead/jewelry section to find a selection of elastic cord. Double stringing the bracelets is also a great idea if you’re rough on your jewelry!

starbrights plasticone

Next, pick out a color scheme or shapes you like and string the beads onto the double cord. When the beads are on the cord long enough that you can easily wrap it around your wrist with no spaces between beads, Tie it. Tie it very secure and then dab a drop of clear nail polish or super glue on the knot and let it dry.

After it’s dry put the bracelet on or give it to a friend (ideal). Deck your arms out in your best ones when you’re going out to a fun club, party or rave for the night and hand out bracelets to friends and people you meet. You’ll find that when you go out and have fun you’ll usually come home with one or no bracelets. Now it’s time to make more!