Browsing Category

Crafts

Crafts DIY

Art Journaling: Let’s Get Started!

10/24/2011

I really adore art journals, ATCs (artist trading cards) and decorated mail. Don’t you? I love the time and effort that goes into creating them and the mixed-media collaging that tends to take place. I’m kind of new to the scene, I have to admit, and I was never much of a scrapbooker so I figured a great creativity challenge for myself would be to start an art journal.

Why don’t you start one with me? (If you already have one start a new one, we’ll be doing more spreads in the future.)

First off, if you don’t have a journal (I needed a new one) you’ll need to get one. Composition notebooks work great and they’re inexpensive. I’m using a small Moleskin because I like to do things small-scale. If you have an old notebook lying around with some old notes that you don’t need anymore feel free to use it. You can always cover the notes with paint, marker, paper and decorations.

You’ll also need to prepare the pages beforehand with gesso, glue sticks or rubber cement and maybe some Mod Podge to paint the page with when you’re finished?

Let’s start the journal off with a self-portrait or representation of you, your name and 5 things you love (this is to inspire your decorations!). For this spread you’ll need to cut out photos of things you love either via magazines or your printer, to find patterns on scrapbook paper and fabric that you like and a colorful selection of paint/markers/pens.

first art journal attempt

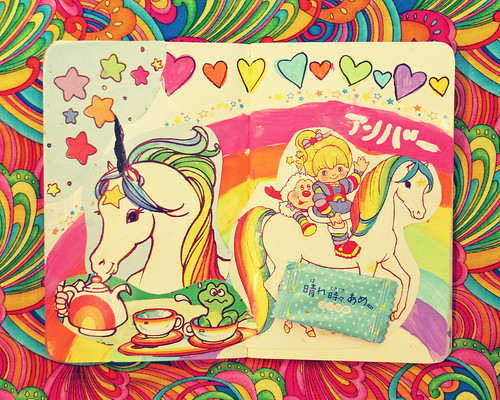
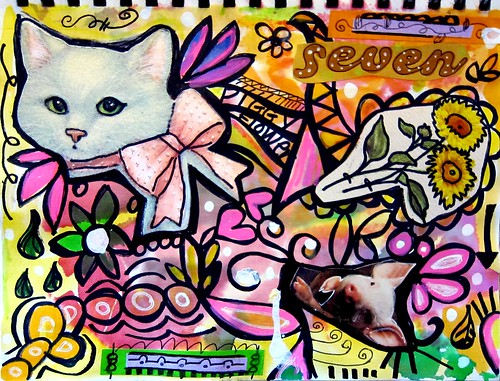
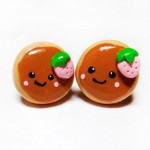
My list of 5 things I love was coffee/tea, hearts, stars, unicorns and Japanese candy. I am represented as Rainbow Brite because my brother wanted to name me that when I was born. Also, my name is in Katakana because once upon a time I left my heart in Japan.

How did yours turn out? Please email it to us so I can post it here.

If you’re interested in learning more about Non-Digital Art Journaling there’s a great article to get you started here and an AMAZING ecourse I just found out about (and that I really must participate in) here — looks like a great class to get your inspiration juices flowing and to learn a lot about yourself!

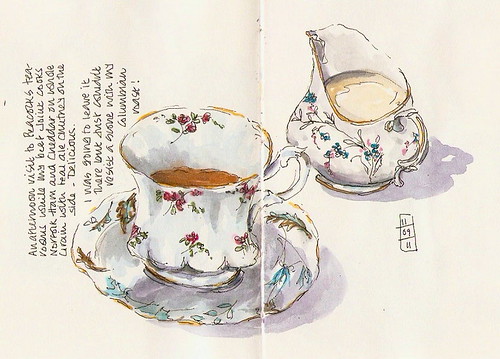
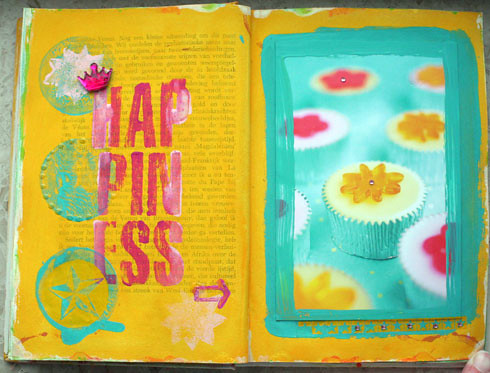
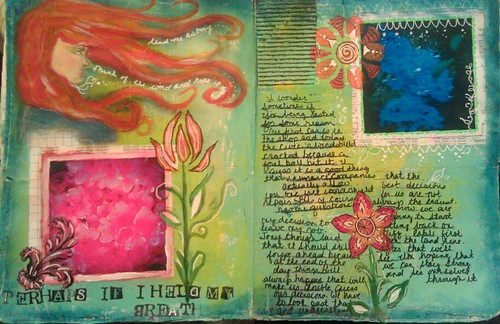
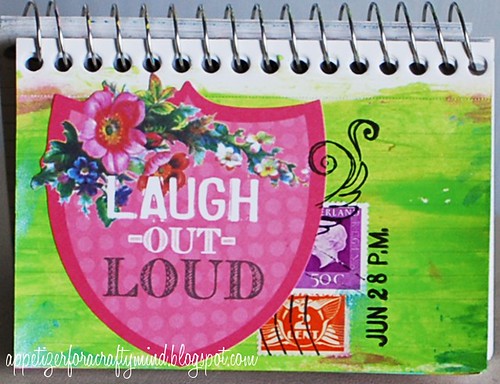
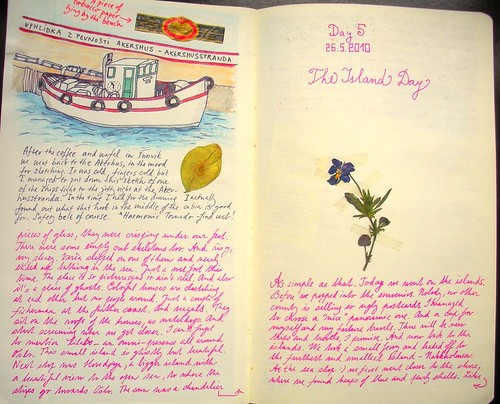
Here are some gorgeous journal pages I found while surfing Flickr to get you inspired.

11-09-11a
Art journal happiness
journal 07 10 11
ICAD #22
Oslo Travel Journal_Day 3
Art Journal Page

Crafts DIY

Crafts Around the Web: Surprise Balls

10/18/2011

This is probably one of my favorite little gift ideas — how cute! Learn how to make them at not martha, poppytalk and seesaw. Don’t feel like making them? You can buy some adorable ones at TOPS Malibu.

With all of this cuteness I’ve joined a surprise ball swap and am going to get my supplies tomorrow to make my own. I have a lot of crepe paper left over from Colette’s birthday so I just need some extra surprises! Want to join in the swap with me?

I’ll make a post about how to make surprise balls following the swap.. I don’t want to give away the surprises inside in case my swap partner finds my blog!

Update: I was so inspired by these surprise balls that I made some Miseducated Surprise Balls for the shop.

Crafts DIY

Acid Wash Your Own Clothes

08/05/2011

This started as a bit of an accident you see.. my husband unknowingly bought me a bleach cleaner recently. I’ve since accidentally bleached my new shirt and the carpet both while obsessively trying to clean our apartment. I got ready to trash the shirt and immediately wondered if there was some way I could salvage it…

All you need is a t-shirt (some other color besides white) and all-purpose spray-on bleach (or if you’re planning ahead use clorox in a spray-bottle).

First lay your t-shirt face up in the bath tub and give it a quick spray (with the bleach) all over; make sure to get some larger drops as well.

Turn the t-shirt over and spray the back in the same fashion.

If you’re dipping it to give it a fade.. pour the bleach into a bucket, dip and hang on the shower curtain to dry.

It will take an hour or so to dry and fully change color but you should see it begin to change immediately.

Viola!
Now feel free to leave it this way or dye it but make sure you do wash it before wearing it!
Try this on other shirts, jeans and jean shorts for an 80s flashback look.


The damage.


Thanks to The Ragged Priest.
Crafts DIY

DIY Ripped & Burned Tights Tutorial

05/03/2011

Ripped tights are pretty popular right now and it’s no wonder — they instantly add a punky, ragged feature to your look and they’re easy as pie to make! Grab a pair of tights, old or new, and follow along to achieve that ripped look.

Create Large Holes

First I used a lighter to create holes that wouldn’t run, the fire actually burns the nylon and creates a seal. For holes and rips that wont run use a lighter or stick of incense. Softly touch the fabric and the hole will become bigger. Be careful if you’re wearing your tights while you’re burning them, nylon can drip onto your skin and permanently scar!

Create Runs

To create runs in the stockings you’ll need a pair of sharp scissors. Carefully make small vertical snips and drag the scissors up against the cut to make a run. To seal runs so that they stop use a lighter or a tiny dab of clear nail polish.

Crafts DIY

Create a Kawaii Pancake with Polymer Clay

04/25/2011

I had the recent treat to meet fellow Etsy crafter, Emi. She creates cute clay charms for her shop, Cat Bear Express, and luckily wanted to teach us to make a cute pancake!

I invited her to share her tutorial here and asked her to tell us a little about her shop and creations:

I created Cat Bear Express to spread cuteness around the world with my charms. Every piece is made by me with lots of love and care put into every detail, and I aim to bring a smile to everyone who receives a charm. I’m a gamer girl so a lot of my pieces are inspired by video games, and also anything cute, bright and girly! ~ Emi

Instructions

1. Roll out 2 pieces of light tan colored clay into flat circles
2. Roll out 2 smaller circles of a light brown clay and place one on each of the larger circles
3. Smooth down the edges of the inner circle by pressing down and pulling toward the outer sides
4. Add your toppings! For raspberries roll out 7 tiny red circles and arrange them in the shape pictured.
5. Bake according to the directions on the clay package and allow to cool. Paint on the face and attach to earrings or anything else you want.
6. Glaze or leave it for a matte look, and you’re finished!

Gallery

Here are some other adorable creations Emi has made and is selling on Etsy:

Crafts DIY

Upcycle Your Soda Pop Can: Ashtrays & Catch-Alls

04/08/2011

Smoking is a bad habit. It causes cancer and, if smoking indoors, can make you and your entire home smell like an ashtray. However if you’re still a smoker and have an occasional cocktail cigarette/cigar then why not decorate your dirty habit with this kitschy ashtray? Actually these don’t have to be used as ashtrays at all they can be catch-alls and candy dishes if you like!

Instructions


Gather scissors and rinse out a new soda pop can (old ones can be sticky!).


Cut the top of your can off — it doesn’t have to be perfect, these ends will be folded under.


Cut the can into thin strips and fold them flat like a daisy.


Turn the can upside down and wrap one strip left and around the one next to it (see photo).
Continue this all the way around the can.


Viola!

Crafts DIY

Letโ€™s Make Permanent Daisy Chains

02/11/2011

Please excuse Miseducated again for looking a little curious lately, there will be lots of changes occurring over the next few weeks!

I’d love to sit outside along the water and braid delicate clover blossoms and smiling daisies.
Don’t you love daisy chains?
My daisies are gone, they’re under about a foot of snow and ice.
How will we have a relaxing and flowery day in the sunshine?
My best friend suggested we go to the craft store recently and purchase the tiny craft roses for just that purpose!
Why hadn’t I thought of it before?
A permanent daisy chain?
It’s simple!

Pick out a couple of the metal-stemmed flowers at your local craft shop.
(At our craft shop they’re in the wedding section~)
I got two bouquets of contrasting candy colors.

It’s quite easy, just twist them together similarly to the knotting you do on a real daisy chain..
When you have a chain large enough to sit atop your head twist the ends together.


Crafts DIY

Crafts from Around the Web Vol 2

01/14/2011


Recycle cute containers to make kitschy magnets.
Create a MiuMiu style collar with Audrey.

Create individual cupcake stands with Goldiloks.
Sew bows onto ankle socks for instant cuteness.

Thank you again to each of the authors for your lovely craft tutorials! I’m very interested in featuring other creative blogs as well, there is so much talent on the web that shouldn’t be missed!

Now let’s get creating…

Crafts DIY

An Introduction to Colorful Art Mediums

01/12/2011

Sometimes getting your hands (your clothes, your surroundings…) messy and covered with a rainbow of colors is part of the art/crafting experience. I’ve gotten pretty familiar with several different mediums and I’ll give you a little run-down of why I love them and how I use them. If you haven’t used some of these before, I hope I can inspire you to try them! Note: I’m not an art expert, just a lover.

Oil Paints

Creamy, dreamy, vivid. I love working with oils because you can do so much blending (they dry slooowwly) and the colors are so rich. In school, we got to stretch and prime our own canvases ourselves. You can go to the art store and buy a canvas all ready to go, but you can get some satisfaction out of doing it all yourself. The only thing I didn’t like was the fact that you have to use turpentine to thin them and get the paint off of your brushes (it smells), but its a small price to pay.

Watercolor Paints

Of course, the first kind of paint I ever used. They aren’t just for kids though, as you can do so many different tricks with them! Since you can re-wet the paint once it is dry, you can blend existing colors. If you want to layer different colors without disturbing the layer underneath, you can use the next kind of paint on the list…

Acrylic Paints

I’m a big fan of acrylics. You can use them to paint many other things besides canvases. I’ve used them to customize wooden boxes, journals, jewelry, and I’ve painted wall murals with them. They dry very quickly and once they are dry, you can’t re-wet them like watercolors.

Oil Pastels

Messy, bright and beautifully blendable! These may be my favorite of all to work with. I keep some wet wipes handy to clean my fingers if I’m going from a dark color to a light color. I also like to use an in-between color to blend two other colors together. Blending them with my fingers is a lot of fun and makes me feel like I have even more control over the colors.

Colored pencils

They can do a lot in the way of blending, if you vary the pressure, use strokes in different angles and layer the colors gradually. The kind of paper you use will also determine how your picture looks. I like using paper with a smoother “tooth” (roughness), but if you like the gritty, textured look, a rougher tooth is the way to go. The more rough the paper, the more your colors with stick and, consequently, the sooner you will need to sharpen your pencils. Make sure your paper is acid-free so your artwork lasts longer!